 |
| A first birthday - a DIY dream for a crafty mother! |
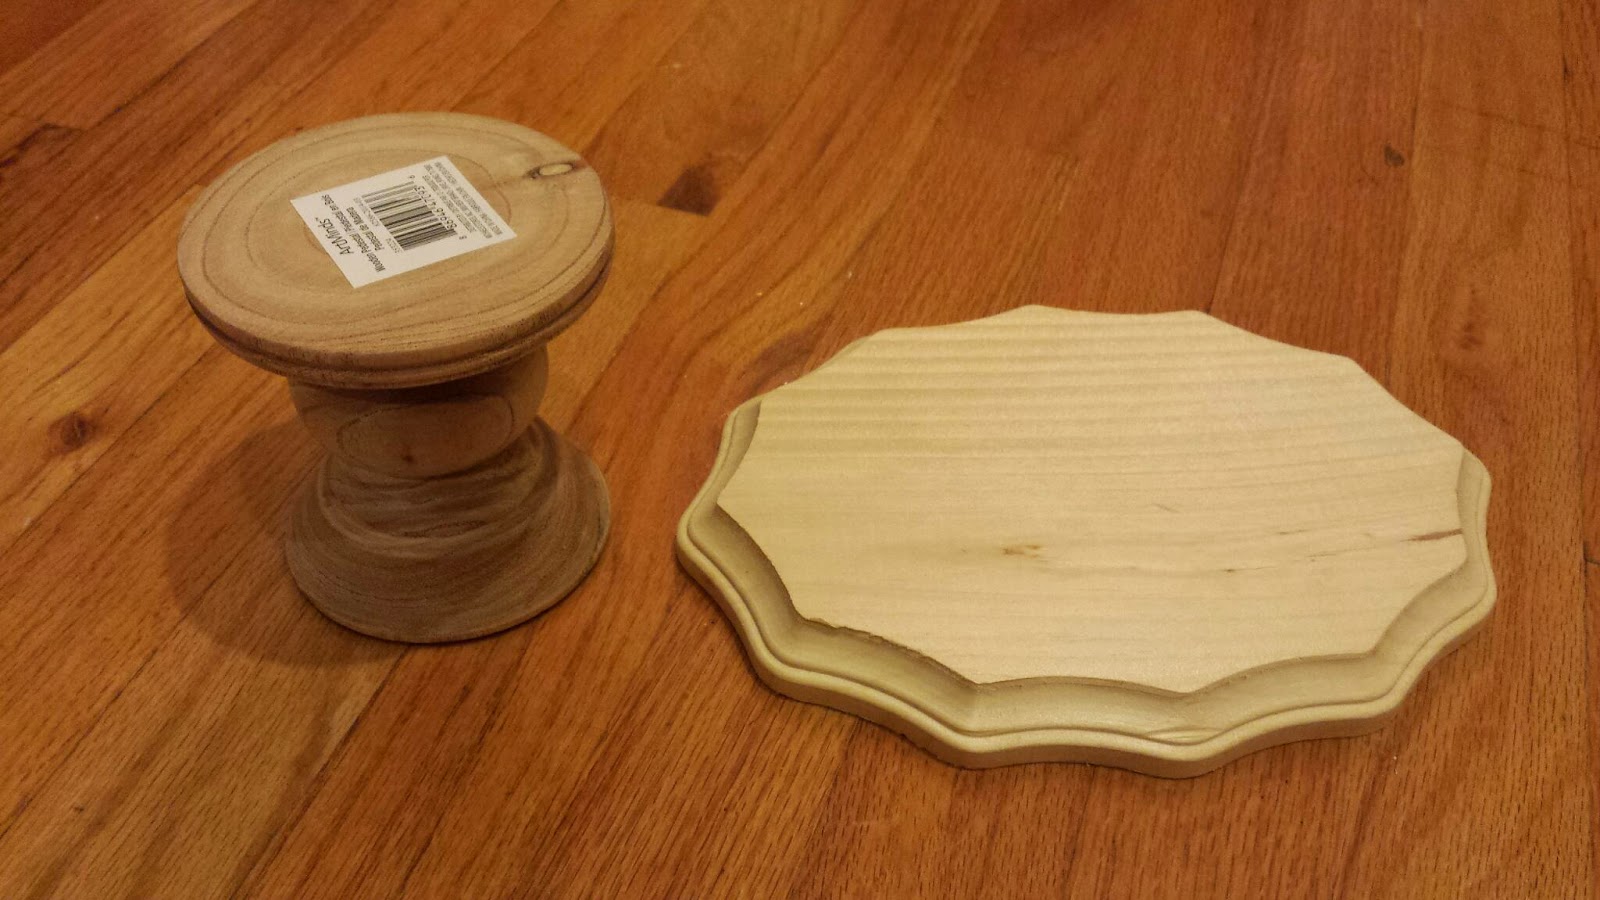
My Materials: Acrylic paint and sponge paint brushes, gorilla glue, 1 - 7"x9" wood plaque ($2.99), Wood Pedistal ($4.99 but with 40% off coupon $2.99.) The right price for an experimental project!
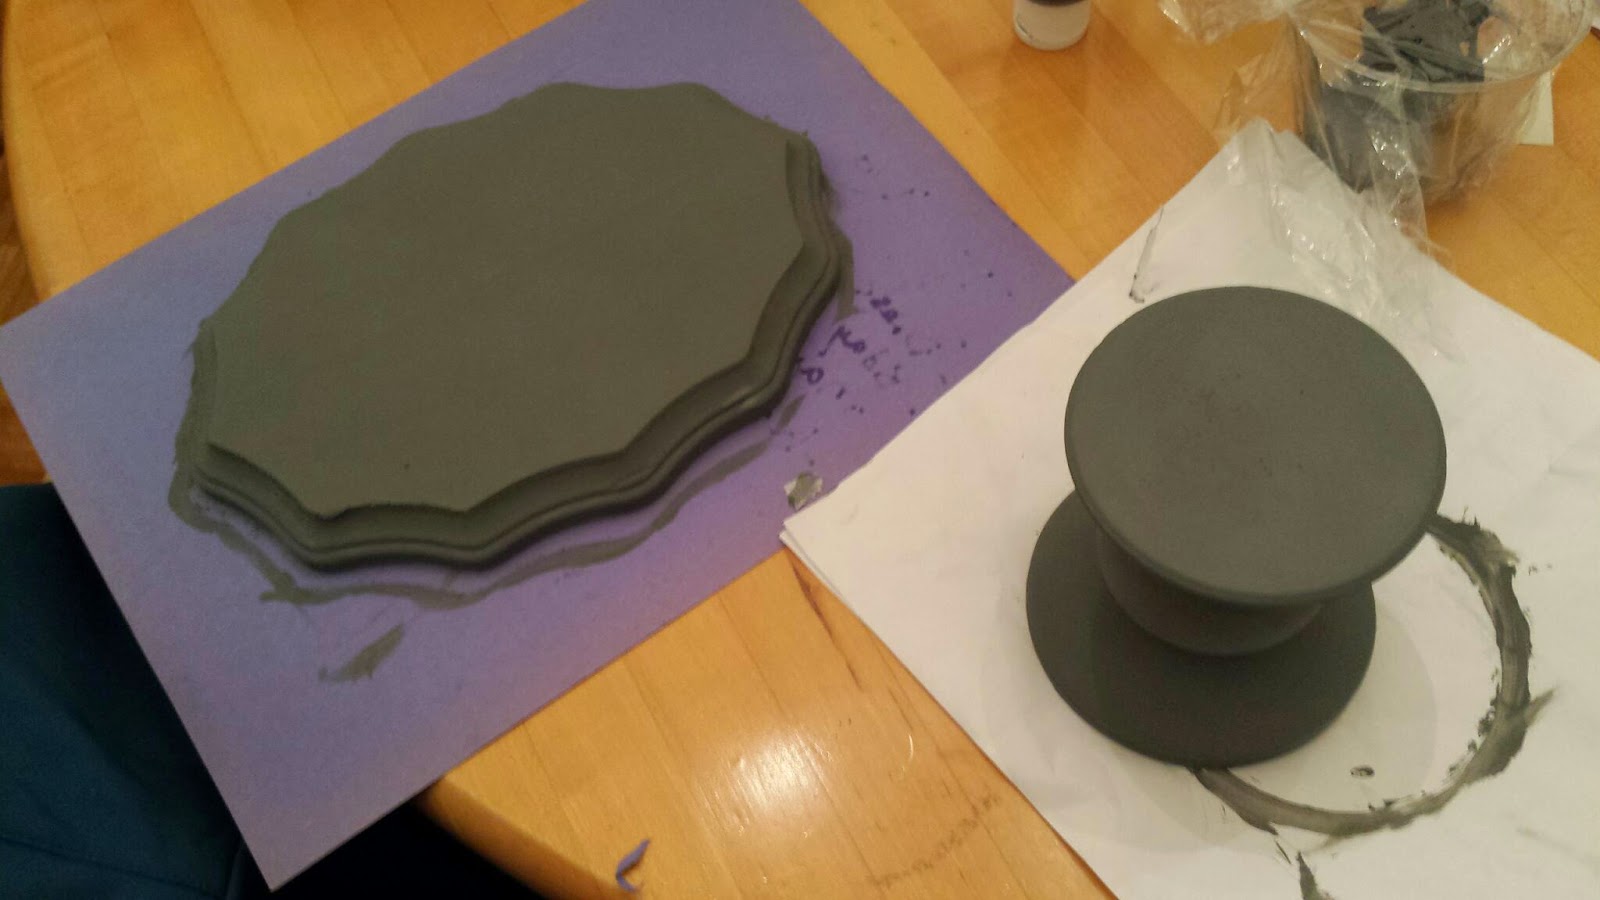
The paint that I had is left over from other birthday projects (I made little chalkboard food labels out of cardboard) and from his whale chalkboard nursery decoration. I debated making this pedestal the lime green that is part of the party colors but in the end decided to go with the neutral grey so that the cake would shine and be the star. (Plus Lucky's cake smash outfit had a lot of green in it and I didn't want to take away from his little turtle butt!)

I painted the underside of both pieces Navy. This will only show if Lucky knocks the whole thing over, but I thought it could be cute to have a contrasting color on the bottom of the top piece and figured that I might as well color the bottom of the pedestal, too. Once these coats of paint were dry I was ready to start gluing.

So... the gorilla glue instructions say that you should only use a little. You really should listen to those instructions. We applied the glue, never having used it before, and then secured the base to the top when WOOSH, out came the expanding glue around the edges. This white strip of glue ruining my perfectly painted pieces. I held some hope that it would turn clear in the end, but that didn't happen.

I actually debated sending my husband for a whole new set of wooden parts. This is one week before Lucky's birthday, so I was a little manic. In the end, I took an exact-o-knife and shaved off the excess glue and painted over it. The edges aren't quite as perfect, and you can tell the glue was there... but I decided that no one would notice but me (and you now that I've pointed it out.)
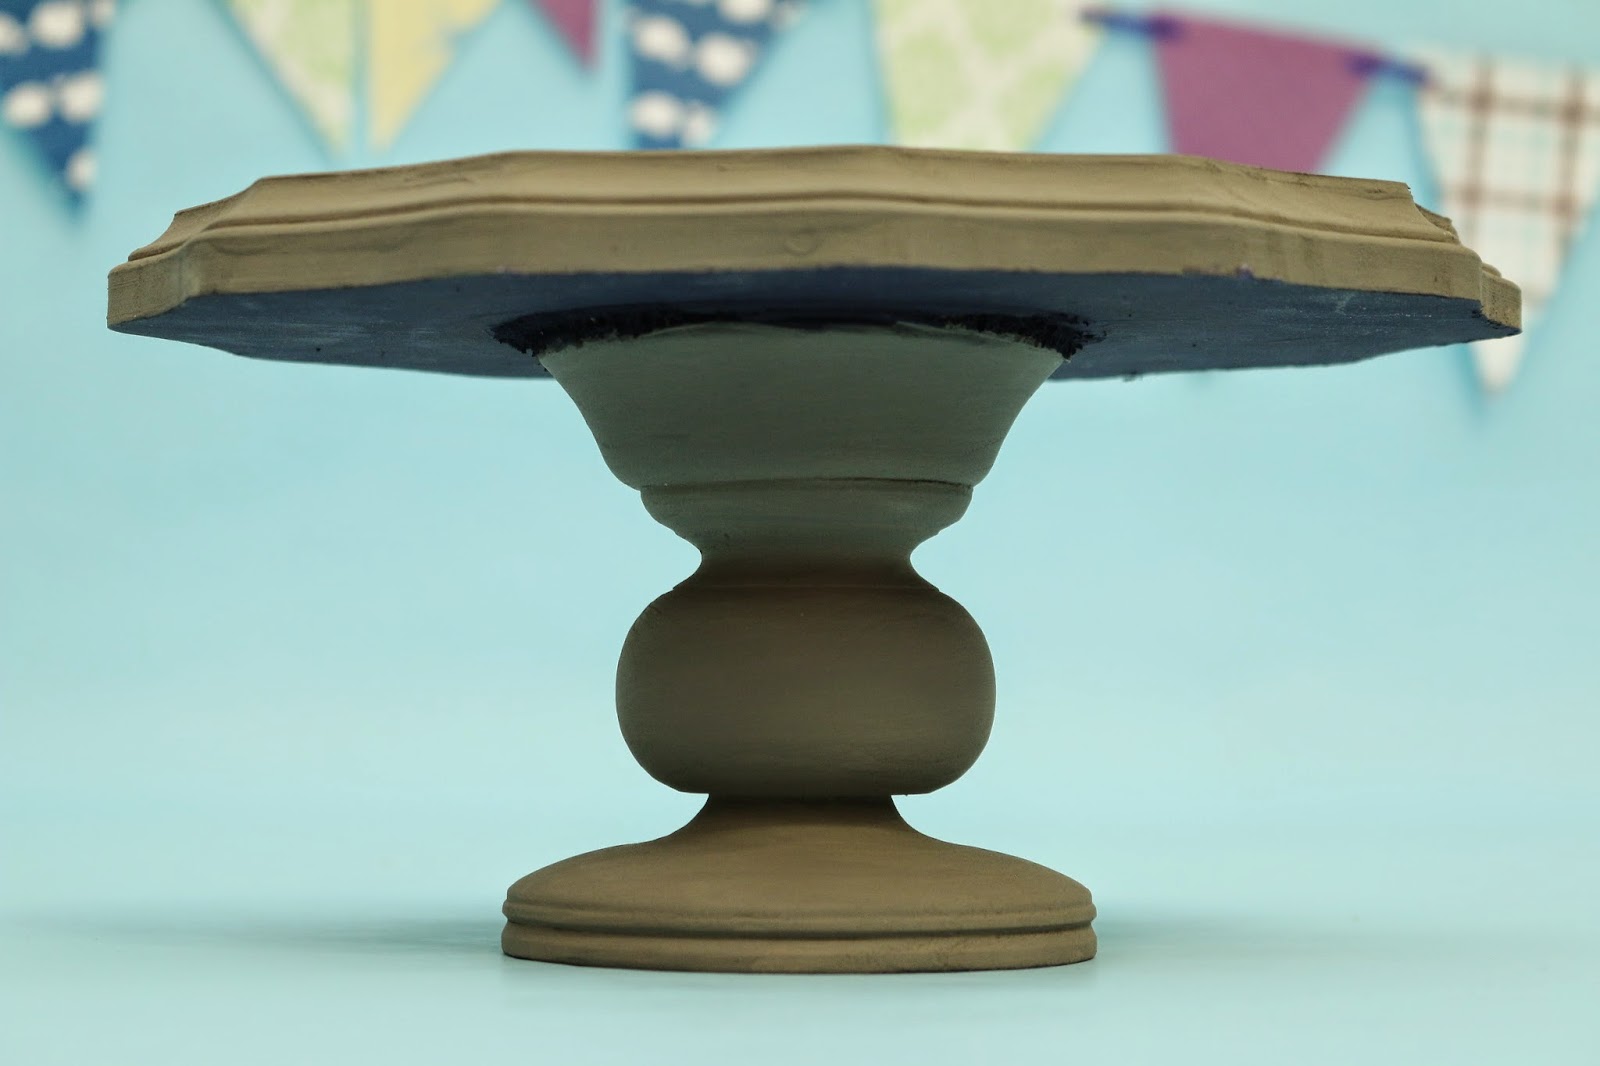
I'm glad that I kept the original pedestal. I think this is the only picture from the entire birthday photoshoot where you can tell something *could* be off around the join of the pedestal to the top. I hope that you will feel courageous enough to try this for yourself, just remember that LESS IS MORE when it comes to the glue.
----------------------------------------------------------------
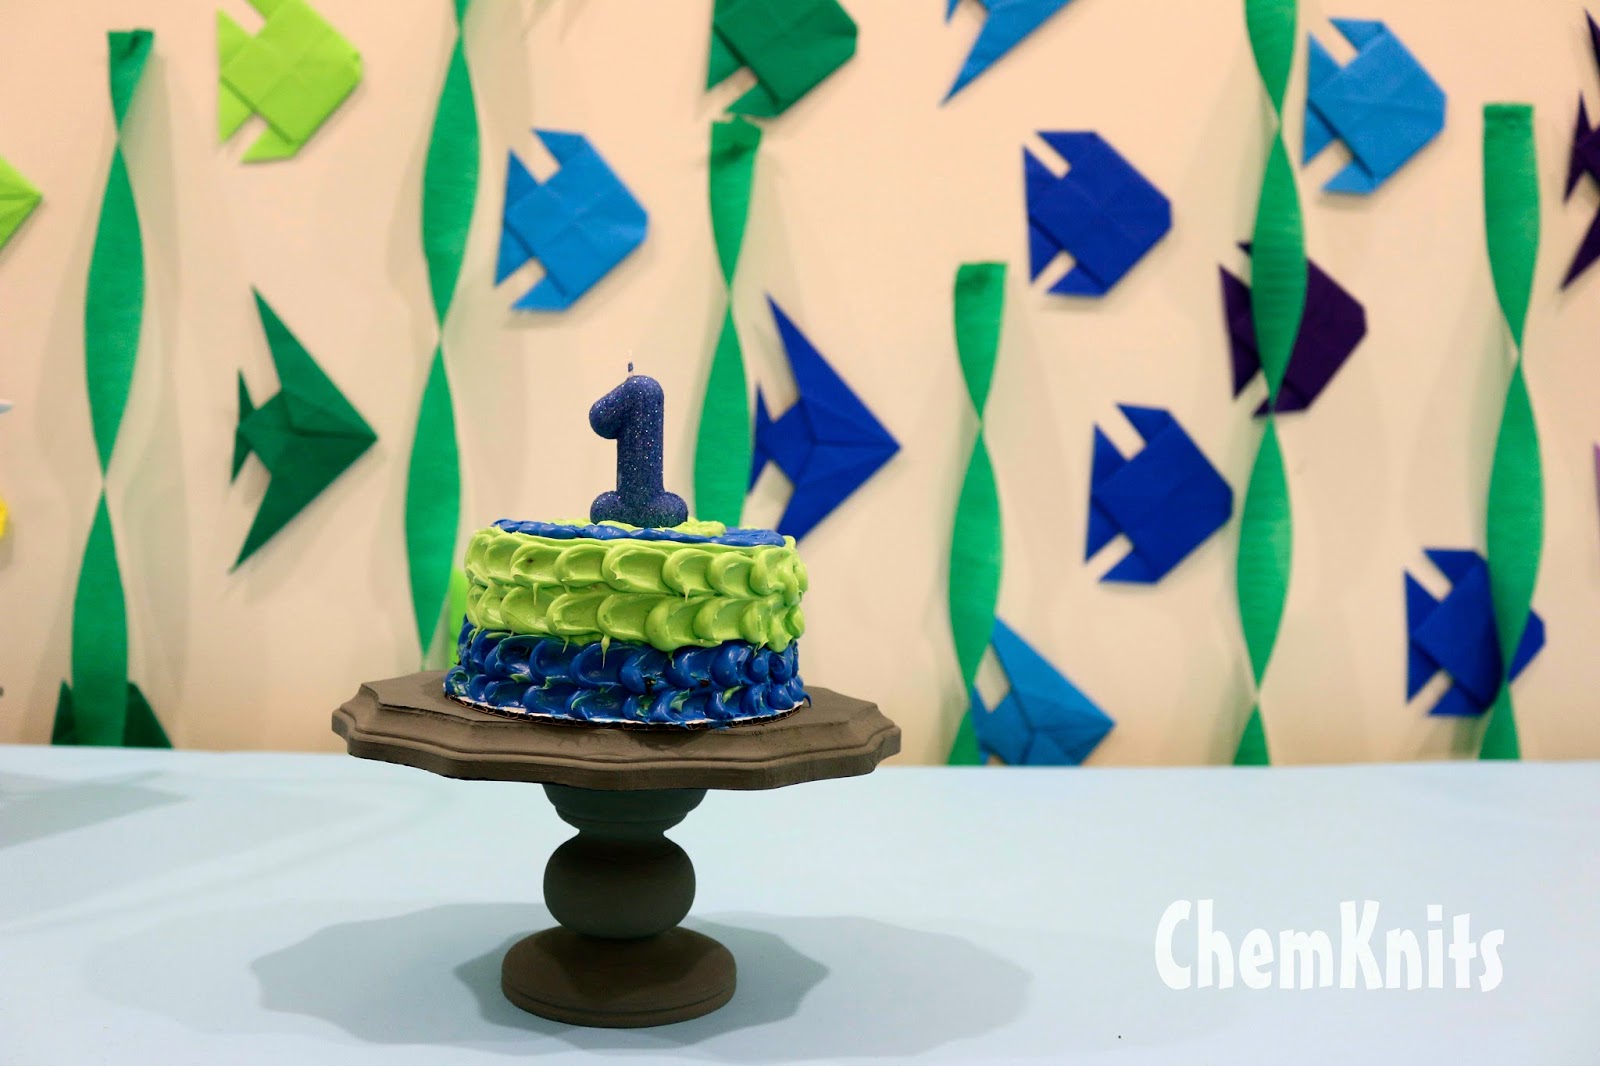
Practicing for Lucky's Cake (Because what would a cake stand be without an egg-free cake for a 1 year old to smash?)
Initially I was going to do a whole separate post about Lucky's cake, but it turns out he is now 16 months old and I haven't finished up writing this post. Whoops! Why not combine the cake with my DIY pedestal so that you can see the final project in all of its glory! *Woosh* let's go back in time to a big milestone for my baby.
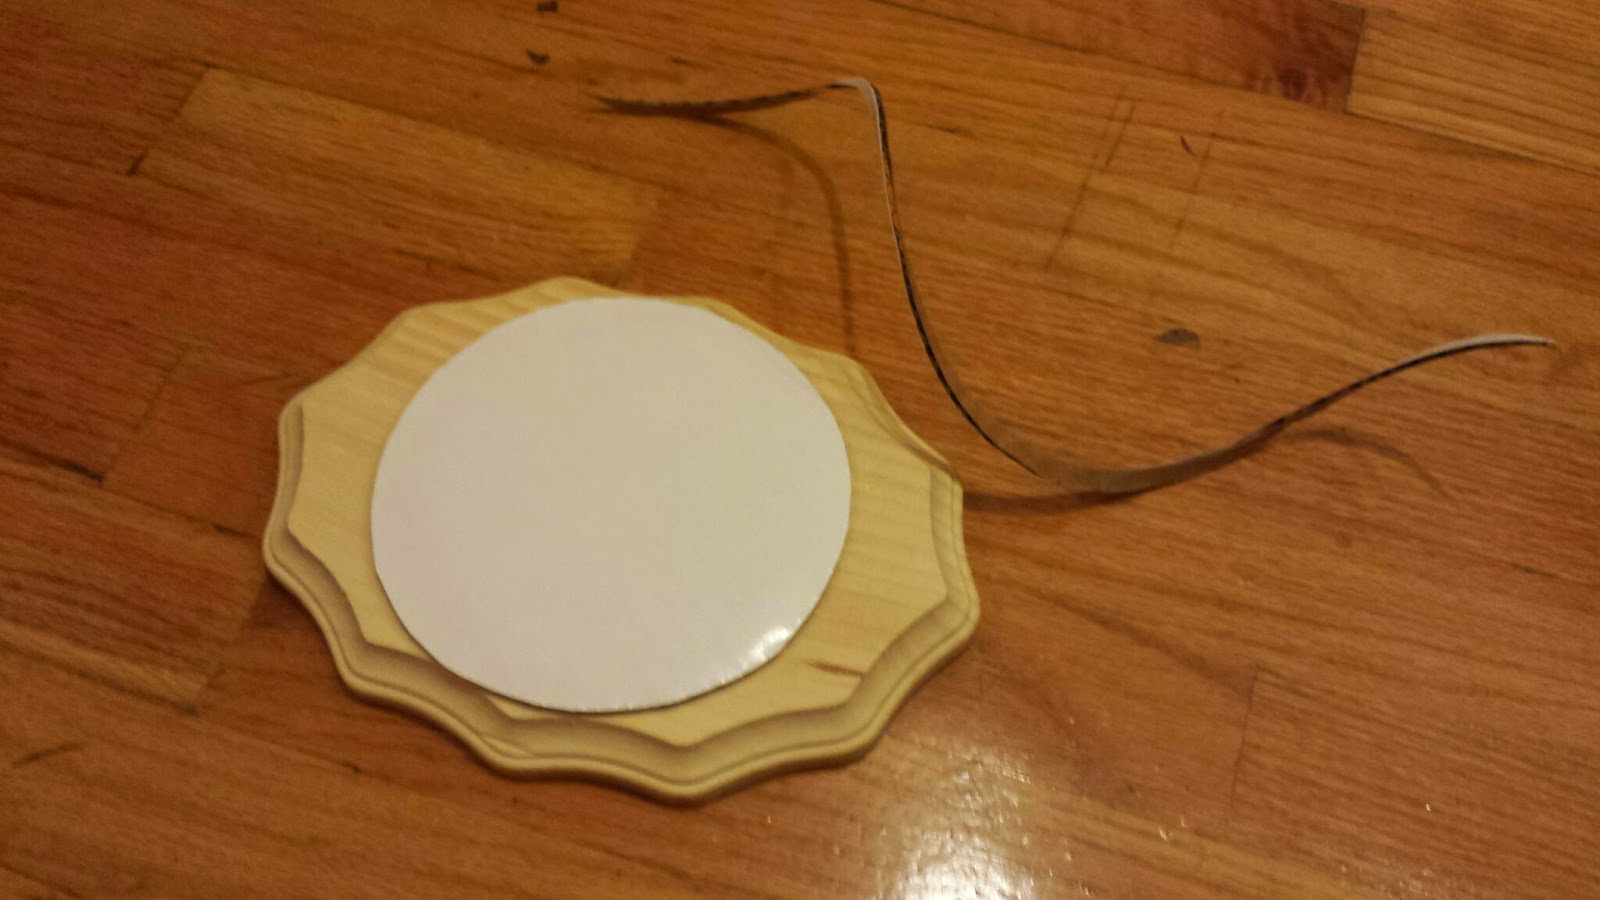
I had to cut down the Wilton 6-Inch Cake Circles

For Lucky's cake, I purchased a 5" x 4" Anodized Aluminum Round Cake Pan
Egg Free Smash Cake Modifications
- 1 box Duncan Hines Devil's Food (moist) mix.
- 3/4 cup canned pumpkin + water and oil as directed (No eggs! I substituted 1/4 cup pumpkin for each egg.)
- preheat the oven to 325 degrees F
- Bake 5" round, 3" deep cake for 1 hour 20 minutes or until a toothpick comes out clean.
Because I was planning a whole DIY photoshoot of his smash cake, I did a test cake some weeks before his birthday. I wanted to practice my frosting manipulations and see what worked and what didn't.

The cake itself came out great. It was a bit crumbly, but firm enough that I was able to slice it in half to get two layers. I mixed some very blue frosting (required a TON of Wilton's Blue food coloring, more than I ever use to dye yarn) and did a simple icing of the cake. I even made my own piping bag out of a zip lock! I needed the blue to be deep since the photoshoot backdrop was a pale blue.

I iced the cake by adding small dalops of icing to the side, and them smoothing them back along the cake with a spoon. They started looking scale-like or even almost wave-like.

I did the same thing on the top of the cake, but pulled the icing towards the center for a star burst effect.

My original plan included a cake pop octopus on top of the cake. How cute would a yellow ball on top of this cake look? Unfortunately my cake pop looked super messy and pinterest fail-y so I decided to leave it off. I did pipe a cool looking fish, but that wouldn't show up too well flat on the top of the cake.

Now there is one thing you might be asking... where are pictures of Lucky with his cake? Stay tuned because those are coming. As I was baking his actual cake for his birthday I took notes of some thoughts that I decided to share with you surrounded by pictures of my happy birthday boy. Here is a sneak peak of a SECOND (well third if you include the practice one) cake that we used at Lucky's Under the Sea Birthday Party.