Monday, August 24, 2009

Spinning

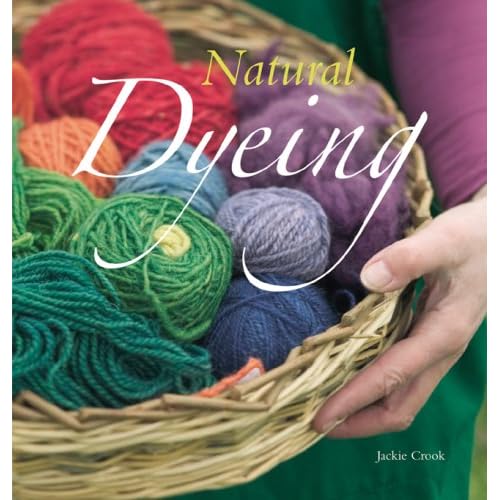
I have recently become obsessed with dying yarn. Looking at the other beautiful colorways people have created, I've come to realize that you can increase the beauty of the yarn if you dye un-spun wool and then spin it yourself. In this post, I will highlight some good resources I found on the internet, and my own first attempt at using a drop spindle.

The Joy of Handspinning
contains videos to help you see how to spin with both a wheel and a drop spindle.

Drop Spindles cost $10-20, but Spinning Wheels cost hundreds (many are $400-600). I think that it would be easier to maintain a rhythm with a spinning wheel, but I decided that it would be cheaper to try a drop spindle first. (I don't really have space for a wheel at the moment anyway!)

I purchased a drop spindle from Main Woods Yarn & Fiber, and I am very happy with the kit. There are 4 different colors of wool for me to practice with, all for under $30! I could not figure out with the leaflet how to spin the spindle and pull out more yarn from the hank at the same time, so my yarn is fairly over-spun. I doubled the yarn over and it turned itself into a two-ply yarn without needing to re-spin it. So from my first attempt, I have accumulated less than 5 yards, but I would like to keep trying. I've started reserving books from the library to understand more about the process, and to get tips to improve my technique.


Mind's Eye Yarn in Cambridge offers 1-on-1 spinning (and knitting) lessons for $12/45 min lesson. There are also group classes people can take, where you can get help on your projects. If the books that I've reserved from the library fail to help me improve, I might try getting help from a real person.


I doubt that I will ever be able to own my own sheep... but who knows? I know that you can purchase wool fresh off of the back of a sheep and deal with all of the cleaning, carding and preparations yourself. Or maybe Angora Rabbits are worth a try...


(My first attempt is on the right, my second is on the left. I am already improving!)

The book Start Spinning: Everything You Need to Know to Make Great Yarnby Maggie Casey was a good resource for my first few attempts. Reading this book strengthens my suspicion that a wheel can be a bit easier, but a drop spindle is cheaper and a common way to start out. The images are clearly laid out, and the step by step instructions (text and images) are helpful. The book explains about the different types of fiber you can purchase, different methods of drawing out the yarn, carding, troubleshooting and more. There are even some handy tips for plying. If I ever decide to try spinning on a wheel, I will definitely have to check this book out again!

Friday, August 21, 2009

Mordants and Safety

The more I read up about dyeing yarn, the more I'm curious about the chemistry behind the dyeing process.

Mordants and Safety (Note: all safety information was obtained from www.sigmaalderich.com)
  • Alum (potassium aluminium sulfate) - do not breathe dust, avoid contact with skin and eyes. MSDS information says that it is an irritant.
  • Chrome (potassium dichromate) - Dangerous for the environment, very toxic, oxidizing. Sigma recommends use of Eye-shields, Gloves and reusable respirators to protect yourself. Under health risks - may be fatal if inhaled. (Note: many items dealt with in the lab are toxic and dangerous to work with. I must admit that I do not read the potential harms for each chemical I use. But I have to say, the more I read about potassium dichromate, the less I would ever want to use it in my home!) This is not something that you can just toss down the drain or in your trashcan after use, but apparently you can re-use the mordant solution.
  • copper (copper sulfate) - do not breathe dust, avoid contact with skin and eyes. MSDS information says that it is an irritant.
  • Iron (ferrous sulfate) - Same as copper sulfate.
  • tin (stannous chloride) - Corrosive, very harmful if inhaled, can cause irritation.
The article "Are mordants safe?" suggests that many of the salts (except for chrome) are not really that bad since we requre all in trace amounts to survive. (Ingesting some tin when you consume food out of a can is different from eating something cooked in trace stannous chloride residue.) I would never EVER eat out of something that I used for lab work, and I would not recommend ever using items used for mordant for food either.

I am not an expert on dyeing. But the comments on this post are my opinions based on how I deal with lab equipment.

Thursday, August 20, 2009

Natural Dyeing

I have been experimenting with dyeing my own yarn. I checked these books out of the library to learn about more traditional (i.e. non-Kool-Aid) dyeing methods.

Natural Dyeing by Jackie Crook.

Of the sources of natural dye described in this book, I am certainly intrigued by:
  • Rhubarb (yellow, yellow green to copper colors)
  • Tea (browns, the mordants do not vary the color as much here)
  • Stinging nettle (yellow, orange and brown - no way would I go and collect this myself!)
  • red cabbage (blue green - pink)
  • The notion of using things found in the kitchen (red cabbage for light blues, avocado skin for browns and onion for yellows) is very exciting!
Natural Dyeing contains vibrant illustrations and step by step instructions for each of the dying projects. For each of the 31 dyes described, wool treated with each mordant type are shown, which gives a beginner like me a sense on how much you can vary color with different salts. There is a color chart index, listing all of the colors shown in the book. The instructions are clear for describing how to optimize dye uptake with different fibers.

I have better access to Kool-Aid and food coloring than roots and flowers. I certainly have access to chemicals (not that I'd take them from lab!), and I understand hazardous waste procedure. The biggest downside to using these inorganic mordants is the need to have separate dying materials. I think that I will wait to try something like this until I have more than a small apartment, with space to store craft-type items that could be confused for cookware.

Would I add this book to my personal collection? No (I am sure that there are many natural dying recipes on the internet), but it was worth the read!


A Dyer's Garden: From Plant to Pot: Growing Dyes for Natural Fibers by Rita Buchanan
This book starts out describing how to plan your garden so you can have materials to dye with. (A helpful hint, try to focus on plants that give good reds or blues since most plants that you'd find will provide yellow/orange colors.) There are even some suggestions on how to arrange plants in the flower bed, and how many plants you need to yield a certain amount of dye.

The previous book had more detailed photos about the dyeing process. This book has a description, but no vibrant photos.

The most fantastic portion of this book is the dyeing section. On the book edge, there are colors of different mordants on different fibers, so you can flip through the book to find a color you like, and then look and see what the dye is. This organization is very useful.

Overall, this booklet's organization is more practical than flashy, and would be a good resource for someone who wants to practice natural dyeing, not just learn a little bit about it.

Saturday, August 15, 2009

Long live the Queen!


This has been my first attempt at intarsia, and I have to say that it is not as difficult as I thought it would be. The problem that I have with this technique is that all of the strands that you're carrying get hopelessly tangled in back of your work. (Maybe getting yarn bobbins would help with this problem...) With 13 different balls of yarn, that makes a lot of ends to weave in. (Does anyone enjoy weaving ends in?)


I had a few complaints about the pattern itself (found in Pretty in Punk: 25 Punk, Rock, and Goth Knitting Projects by Alyce Benevides and Jaqueline Milles; see my review): The authors claim that this hat is "felted" but it is really only lightly felted (if at all). If you were to place this item through a whole wash cycle in your washing machine, it would come out fitting a child. The small, medium and large hats all have the same number of sts, they just have you change the guage. If you consider this hat to be more of a novelty gift, rather than a functional winter hat, then I feel better about the whole project. I would just use some caution when following patterns in this book.


I am thrilled with the way the hat came out. The mohawk stayed up with only light blocking. I think that the woman I knit the hat for will really love it, and really, that is all that matters. I think this is the most unique project I have ever completed. I had a lot of fun making this hat.


Tuesday, August 11, 2009

Assembly of Alphabet Charts

I have included the approximate letter size for some of the patterns (towards the end, when I hit the jackpot, I did not do as much counting.) This should make it easier to choose my favorite!

Wednesday, August 5, 2009

First try - 100% Wool Colorway

This was my first time dying 100% wool. I'm so proud that I'm showing the final, dry skein at the beginning of my post!  The yarn base was bare KnitPicks Palette fingering weight yarn (Affiliate Link). 


I dissolved 5 packets of Blue raspberry lemonade Kool-Aid and 5 packets of Kool-Aid lemonade into 1/2 cup of water. I then set up my color gradient as follows:

  • 40 mL yellow Kool-Aid mix, 10 drops yellow food coloring, 5 drops NEON green
  • 30 mL yellow Kool-Aid mix, 10 mL blue Kool-Aid mix, 10 drops yellow food coloring, 2 drop NEON blue food coloring, 1 drop green food coloring
  • 25 mL yellow Kool-Aid mix, 15 mL blue Kool-Aid mix, 8 drops yellow food coloring, 4 drops NEON blue food coloring, 5 drops green food coloring
  • 20 mL yellow Kool-Aid mix, 20 mL blue Kool-Aid mix, 6 drops yellow food coloring, 6 drops NEON blue food coloring, 10 drops green food coloring
  • 15 mL yellow Kool-Aid mix, 25 mL blue Kool-Aid mix, 4 drops yellow food coloring, 8 drops NEON blue food coloring, 5 drops green food coloring
  • 10 mL yellow Kool-Aid mix, 30 mL blue Kool-Aid mix, 2 drop yellow food coloring, 10 drops NEON blue food coloring, 1 drop green food coloring
  • 40 mL blueKool-Aid mix, 10 drops NEON blue food coloring

I wrapped up the yarn, and microwaved for 1 min on high (it didn't seem to get as hot as the other yarns) three times, allowing it to cool between each zap.


I cannot wait to incorporate this into a pair of mittens for myself. I'm hoping that, mixed with black or navy, I will get a stained glass effect.


About the extra dye

I didn't wring the the wool out enough, so I was only able to deposit ~2 syringe-fulls of each dye (about 1/2-3/4 of what I made). I therefore decided to try dying something that was pre-knit. I had a square for my sampler afghan that I knit too loose and that I planned to unravel. This gives me an opportunity to examine this technique.

I rolled up the square, and deposited the remaining dye onto it. Microwaved 2x for 1 min on high.


Notice how much more faded the colors are in the pre-knit piece once it dried. The 100% wool retained the brightness, even once dry. The 20% wool (the pre-knit piece) did not.

Unraveling the pre-knit piece was fun. I may trust myself to dye a final project in the future.