I have been a lucky girl, and have been to many games at Fenway Park to cheer the Red Sox. It is often really cold so I am an expert at keeping warm during rain delays. Unfortunately this means that my Red Sox gear is covered, so I wanted to think of a way that I could still show my Boston pride while being bundled up. I therefore bring you the Fenway Mitts, convertible mittens with the Red Sox logo. Your hand can stay warm, plus convertible mittens are awesome.
Materials
- Knitting Needles: 5 - size 3 (3.25 mm) double pointed knitting needles
- Yarn: 2 balls of Rowan Felted Tweed DK (knit 2 strands at a time), scraps of Telemark Yarn red and white. (Note: Telemark has been discontinued. A reasonable substitution is KnitPicks Wool of the Andes Sport.)
- Gauge: ~6 sts/inch. 8-9 rows/inch
- Misc: Yarn needle
- Finished Size: 3.5" wide, 8" cuff to fingertips
The ChartI will provide written instructions below, but I also created a chart of each mitten hand to help you visualize the placement of the chart relative to increases for the thumb. The
Red Sox knitting chart on its own is located in a different post (I'm using the Large B.)
Charts of the left (left) and right (right) handed mittens. The charts start (at the bottom) after the completion of the cuff all the way until the first round of decreases. The yellow stitch indicates the picked up stitch (after thumb stitches are set aside.) The pale blue row indicates where on the palm side of the mitten you knit two rows in waste yarn to create the convertible mitten (if you want standard mittens than ignore this row.)
Instructions for Right Hand Convertible Mitten (Glitten) - We are going to create a mitten that has two rows of waste yarn on the palm. Later we are going to cut the waste yarn out, pick up the stitches and knit an overlap to make these mittens convertible.
- Cast on 44 stitches with double stranded Rowan Felted Tweed (or using a single strand of sport weight wool)
- Knit in 2x2 ribbing (K2, P2) for 1.5 inches (~13 rows)
- Knit 4 rounds even
- Beginning the increases for the thumb: K21 (place marker), Kfb, Kfb, (place marker), K21 (46 sts)
- K 2 rounds even
- Begin knitting the Red Sox Chart: Knit the chart pattern to the first maker, Kfb, K2, Kfb (in the stitch before the second marker), K to the end of the row (48 sts)
 |
| The wrong side of the B on the mittens. I knit the B with a faux-intarsia. I used 4 strands of white and 2 strands of red and carried these up the knitting. The floats ended up being really small. |
- K 2 rows, continue working the B chart on the back of the hand (the first 22 stitches of each round)
- Increase Row: K chart to the marker, Kfb, K4, Kfb (in the stitch before the second marker), K to the end (50 sts)
- K 2 rounds even, following the chart on the back of the hand.
- Continue increases stitches for the thumb, with 2 rounds knit across in between each increase round until there are 56 stitches.
- K 1 round even (don't forget to continue following the chart for the first 22 stitches!)
- Slip the 14 stitches in between the two markers onto scrap yarn. These will later become the thumb. (42 stitches)
- K21 stitches (following the chart), pick up 2 stitches (one from each end of the thumb), K 21 stitches (44 sts)
- Follow the chart until you reach the row with light blue on the B. Knit the first 22 stitches following the chart (this is the back of your hand.) With waste yarn, knit the last 22 stitches, turn your work and purl 22 stitches (completing two rows with green waste yarn.) With your MC, knit across the waste yarn rows to complete the round.
- Knit the last 3 rounds of the B chart.
- K 14 rounds even
- *K2, K2tog* across ( 33 sts)
- Knit 5 rounds across
- *K1, K2tog* across ( 22 sts)
- K 1 round across
- k2tog across (11 sts)
- K2tog 5 times, K1 (6 sts)
- break yarn and pull through remaining sitches
Instructions for Left Hand Convertible Mitten - Follow the right hand instructions except knit the B chart in the last 22 stitches of the round rather than the first 22 stitches. (This will put the increases for the thumb to the right of the B chart.) The B chart is still on the back of the hand, and waste yarn (at the light blue row in the chart) happens on the first 22 stitches of that round.
Instructions for the Thumb
- Take the 14 stitches off of waste yarn and put back onto 3 dpn's. (14 sts) Tip: you can always use a smaller needle if you're having trouble picking up the stitches.
- Pick up 2 stitches on edge closest to the hand (16 sts) and knit 15 rows
- *K1, K2tog* until last stitch, K1 (11 sts)
- k 1 row across
- K2tog across until last stitch, K1 (6 sts)
- cut yarn and pull through remaining stitches.
Turning the mittens into convertible mittens
- Pick up 22 stitches on each edge of the waste yarn (on the palm of the mitten) and cut the waste yarn out. (Tip, it is easier to turn the mitten to the wrong side when picking up stitches)
 The stitches have been picked up, and we're ready to cut the waste yarn.

 After cutting the waste yarn, before we start knitting the flaps to keep your hands warm.
- Starting with the cuff side needle and the mitten right side out, work 2x2 ribbing as follows:
- RS Row: K2, *P2, K2* repeat from * across (22 sts)
- WS Row: P2, *K2, P2* repeat from * across
- for a total of 11 Rows, bind off
- Finger tip side stitches, work 5 rows in the ribbing pattern pattern, bind off

 The flaps to finish the convertible mittens. The larger flap (cuff side; left) will be sewn into the mitten underneath the finger tip side flap (right)
- With a single strand of yarn, stitch the sides of these flaps to the sides of the mitten (with the fingertip flap on top of the cuff side flap)
- Enjoy your convertible Fenway Mitts!


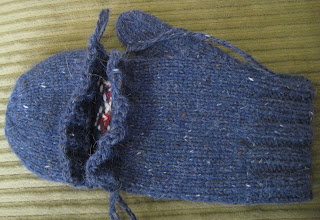
 Fenway Convertable Mitts: Closed (left), Open from the back (middle) and open from the palm side (right).
I will admit that I am a bad girl, I still have to finish my second convertible mitten. However, since I am moving away from the greater Boston area, I wanted to get this knitting pattern published as soon as possible as my tribute to Boston.
---------------------------------------
Abbreviations Used in this pattern:
K - knit
P - purl
Kfb - increase 1 stitch by knitting into the front and back of a single stitch.
SSK - decrease by slipping two stitches then knitting them together. Alternatively, you could slip one stitch, knit one stitch and pass slipped stitch over.
K2tog - decrease by knitting two stitches together.
MC - Main Color
CC - Contrast Color
This pattern was created by ChemKnits for your Personal or charity use. The charts and directions of this pattern are not to be republished without permission of ChemKnits. © 2011 ChemKnits


