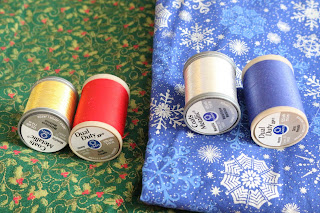
I am skipping ahead to the "Quilted Kitchen" chapter because I want to make some potholders for our moms! The construction looks easy enough an there is a lot of stitching that I can do.
I'm making 4 potholders. Since I had some random batting pieces left I stitched two 3.25" x 7" pieces together to create the 4th 6"x7" square. I'm not planning to save the random scraps of the Insul-Bright, but this enables me to keep a complete 22x16" piece in my stash without having to cut a small square into it.
After stitching the two insulbright pieces together, I had to reduce my tension for this project to two. I used this for the strap on the first potholder and the bottom side (with bobbin) feels a bit bumpy. Maybe the tension is too loose? I think that I will want it this loose as I start the quilting of the top.
For the quilted top, I layered fabric, then insul-bright, then the cotton batting. I want the cotton batting to be on the side of the hand on either side to protect your fingers from the hot pans.
I used stitch #30 (default settings) for the gold embroidery/quilting. The two first sides were 7" apart. This stitch is a little too wide to do every half inch, so I decided to do it every.
When pinning together the sandwich, I made sure that the cotton batting in the pocket was facing up towards me. This way when it is folded together the cotton should be right next to the hand on the inside of the pocket.
 |
| I started at the outside edges with the snowflake stitch |
 |
| Closeup of the snowflake stitch |
 |
| Next I divided the center into sections |
 |
| And then added one more row |
 |
| The bobbin was red! Why waste my pretty metallic thread? |
 |
| Adding the vertical rows |
 |
| The finished quilted wrong side. |
I'm feeling suspicious. I was excited to try out these potholders and so I decided to touch the iron on cotton setting (which should be around 400 degrees F.) I could touch it for a bit and did not get burnt, but I did feel the heat of the iron after a few seconds. There is no way I could hold something hot for a minute even. Then I boiled water in our metal tea kettle and I was able to pick it up and hold my hand against the side comfortably for a while. I felt heat, but I didn't get burned which I would have without a potholder.
When I was about half way done with the red stripes on the second potholder, my bobbin ran out. I am almost done sewing with red and I still only have 4 bobbins! (I know I know, I need to order more.) Since I will soon be switching to blue bobbin thread I didn't want to make a new red bobbin, so I swapped to a brown bobbin left over from Lucky's Lion Halloween Costume.
It looks like I purchased Dual Duty "Heavy" Thread by accident. This looks good for the embroidery but also explains why it feels so "thick". I think I'll need to get a thinner version in the same color Monaco blue
When I started the snowflake pot holders,I kept the same stitching pattern. However, This time I didn't draw lines for where my star stitches should go. The air soluble markers aren't dark enough to show up well on these dark fabrics, so I can see the marks when wet but by the time that I get to my machine they're already too hard to see. This isn't the marker disappearing too quickly, just a lack of contrast. My white pencil needs sharpening, but with the bulk of the batting under the quilting fabric I'm having trouble making marks with it along a rule. This time I'm just crossing my fingers, starting at the two edges and then going in the middle of each line until I get the number of star lines I want.
For the snowflake potholders, I used matching thread for the straight lines. The red thread from the holly potholders had more of a contrast. Ultimately you can't see these blue lines unless you zoom in really closely. However, the snowflake pattern is larger than the holly pattern so this is why I went with the blue versus a white thread.
Two days, four potholders, not too shabby! I don't think I'll ever get used to the fact that sewing projects go so much faster than knitting ones.
Project started 11.3.2015


