Spin to Knit: The Knitter's Guide to Making Yarn
by Shannon Okey is a book that tempted me right away just based on the
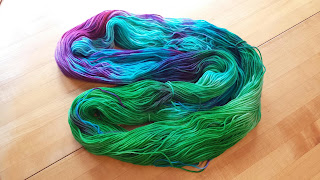
title. I've spun some beautiful yarn, but it is much harder to get
myself to actually use the yarn that I've created. It looks so
beautiful in a hank that I don't want to "ruin" it on the wrong
project.
The spinning section is 50 great pages of
tools, how to pictures and tips. There are tips on carding, fiber
types, spindle spinning and wheel spinning. I've been using YouTube a
lot to help me learn, but I find the pictures in this book to be really
excellent. The sections aren't in depth enough to use as your only
source to learn to spin, but it a handy overview so you can get a sense
of where to start looking for more information. While the book does a
nice job explaining the WHAT, it doesn't do as good a job explaining
WHY. Different types of drafting are explored, but there is no real
discussion on why you might choose one over the other or how it would
make a different type of yarn.
This book focuses on
spinning for the first half, and then knitting on
the second half. The pattern section is titled "What to Do with All
That Yarn," so this is something that I could find helpful! None of the
patterns jumped out at me as something I'm dying to create, but there
is a good mix of items made out of thinner fingering/lace weight yarns
and thicker bulky weight yarns. Overall, the project you pick depends
on how much you want to show off the unique quality of the yarn.
The baby pod was the first handspun yarn I created with a specific knitting project in mind. I didn't have enough of the yarn I created specifically for this project, but I was able to complete it by combining two different handspun yarns.
I'm excited to create more items out of my handspun yarn. This isn't a
book that I would add to my library, but I am very glad I read it. I
didn't know about "spinning from the fold" until now and I'm about to look for more information on this technique!
Friday, February 28, 2014
Tuesday, February 25, 2014
Hitchhiker Prize
I know I said I didn't want 2013 to be all hitchhikers, but when I decided to knit a scarf for a prize at my bridal shower I knew that this was the pattern I wanted to use. It turned out that we didn't need the prize at my shower, which meant that I no longer had the baby deadline to finish this project. Now I'm just making it for fun, but I had some ideas of who on my gift list would really love it.
I started the Hitchhiker Scarf Pattern with 101 g of my Iris Dyed Yarn and size 4 knitting needles. This is yarn that I hand painted with food coloring inspired by the colors of my favorite flower, the iris. The cake gives a better sense of what the final product will look like. I love the color pattern a LOT more upon seeing it in a cake. I was worried that the abrupt color changes would look out of place. The colors mix is BEAUTIFUL, if I do say so myself!
The scarf really looks like an impressionist painting of a field of violets. This knitting has gone slower than I would normally have wanted... but I know that as soon as I finish it I will want to cast on another hitchhiker.
I worked on this project all over the place, and sometimes Lucky even helped me out!
After 34 teeth, 21 g of yarn remain. I'm so close to the end! 35 teeth - 16 g. After 37 teeth (before row 8, 7 g remain. I decided to play it safe and bind off here. This way I'll have enough yarn leftover for a hexipuff and a top secret project. (Although if you check out the ChemKnits YouTube channel, you may know what this is!)
This is my 5th Hitchhiker scarf thus far (if you include the one that I created for Indy.) I love the way it turned out! It took me 6 months to finish this scarf, compared to a week or so for many of the previous versions. Despite this, I am already itching to cast on another one. This is a really great project to take on the go.
I started the Hitchhiker Scarf Pattern with 101 g of my Iris Dyed Yarn and size 4 knitting needles. This is yarn that I hand painted with food coloring inspired by the colors of my favorite flower, the iris. The cake gives a better sense of what the final product will look like. I love the color pattern a LOT more upon seeing it in a cake. I was worried that the abrupt color changes would look out of place. The colors mix is BEAUTIFUL, if I do say so myself!
The scarf really looks like an impressionist painting of a field of violets. This knitting has gone slower than I would normally have wanted... but I know that as soon as I finish it I will want to cast on another hitchhiker.
I worked on this project all over the place, and sometimes Lucky even helped me out!
After 34 teeth, 21 g of yarn remain. I'm so close to the end! 35 teeth - 16 g. After 37 teeth (before row 8, 7 g remain. I decided to play it safe and bind off here. This way I'll have enough yarn leftover for a hexipuff and a top secret project. (Although if you check out the ChemKnits YouTube channel, you may know what this is!)
Just a little yarn is left |
Friday, February 21, 2014
Space dye with Easter egg pellets
Last summer I hosted a dye-a-long for my crochet club. It was so much fun to show my friends how to dye yarn using Kool-Aid. I taught them how to hand paint the yarn, but I also wanted to demonstrate a kettle dyeing technique while we waited for the yarn to soak. Here are some beautiful pictures of kettle dyeing using Easter Egg Dye tablets from a Egg Decorating Kit.
I decided to use 2 blue, 2 purple and 2 green tablets for this dyeing demonstration. Egg dye tablets aren't the cheapest or most efficient way to dye yarn, but they are a lot of fun!
For this demonstration, I used 100 g of Sheila's Sock Yarn from my Wool2dye4 sampler. I added it to a pot of water with 2 T white vinegar. I added just enough water to completely submerge the yarn and let it soak for 20 minutes.
Once I knew the fibers were completely saturated, I turned on the heat to bring the dyebath to a low simmer. Then, I placed the dye tablets in the pot, gently separating the yarn so they would not be placed just on the surface. Then the fun of the demonstration begins, as we watch the dye diffuse into the yarn.
After about 20 min of simmering, there was still a lot of color in water I therefore decided to add more vinegar and water (1/3 cup water with healthy splash of vinegar). This did the trick! The remaining color (all blue) absorbed to the yarn and I ended up with a glorious finished product.
Want to see a demonstration for yourself? The following video will show you how I did it!
Wednesday, February 19, 2014
Welcome Baby Richter!
With a new baby born in the beginning of December, I knew that I wanted to complete a Richter Christmas Stocking by Christmas for the grandparents. The problems? I have a newborn of my own and I didn't know the name (or gender) of Baby Richter until birth.
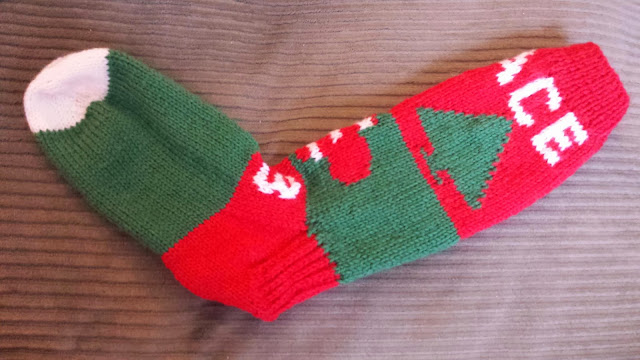
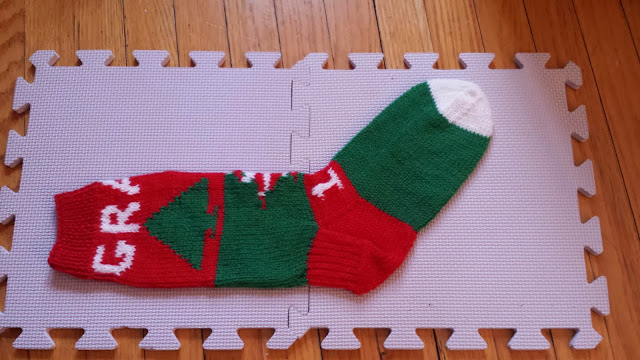
I ended up printing out the above charts and giving it to baby Grace's grandparents for Christmas. I'm so happy to help them keep this tradition alive. In early 2014, I was finally able to cast on and start making Gracie's stocking. It has been so long since I've used straight needles, that this was a bit of a hoot for me.
I messed up with the placement of the Santa eye,placing it over the backpack. I didn't want to erase 4 rows of knitting, so I duplicate stitched over the mistake eye and created a new one. I don't think you'd be able to tell if I hadn't told you.
I should have cropped the yr 13 chart more when I included it with the big chart. My instructions are written for the close cropped version. Thankfully I caught this in the first round I was knitting the year number!
I used a mattress stitch to close the stocking starting at the cuff and working down to the heel. I first did this technique on Keith's sweater and then on my patriots hat and it works really nicely. I'm glad to see my skills have improved since I made Gracie's mom's stocking.
Once I was done the stocking still required some blocking. I soaked the stocking for 20 min before laying it flat on my blocking mats. I didn't even need any pins!
Like Jenn's Stocking, this stocking was knit in KnitPicks Wool of the Andes. In the end, this project used 36 g/ 80 yards red, 9 g/ 20 yards white and 34 g/75 g green. I'm within a gram of each yarn from what I used in my original stocking. Talk about consistency! I used size 3 (3.25 mm) knitting needles.
I am so thrilled to help keep this tradition alive. I'm ready and willing to make more as the family grows! (Although I am sticking with new spouses/children... I couldn't keep this up for the rest of the clan, there are a gazillion cousins!)
This project required that I
create two new knitting charts, Bean Richter's first name and her birth
year (2013).
Hurrah for 2013 babies! |
I ended up printing out the above charts and giving it to baby Grace's grandparents for Christmas. I'm so happy to help them keep this tradition alive. In early 2014, I was finally able to cast on and start making Gracie's stocking. It has been so long since I've used straight needles, that this was a bit of a hoot for me.
I messed up with the placement of the Santa eye,placing it over the backpack. I didn't want to erase 4 rows of knitting, so I duplicate stitched over the mistake eye and created a new one. I don't think you'd be able to tell if I hadn't told you.
I should have cropped the yr 13 chart more when I included it with the big chart. My instructions are written for the close cropped version. Thankfully I caught this in the first round I was knitting the year number!
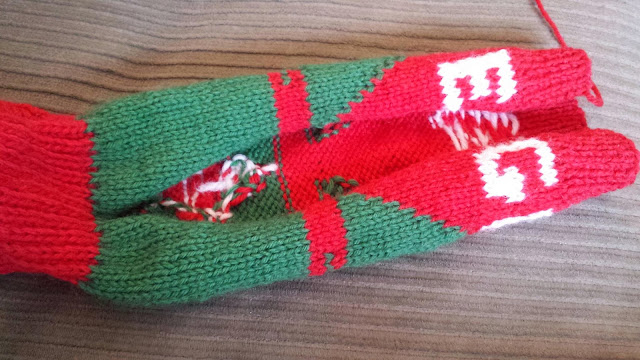
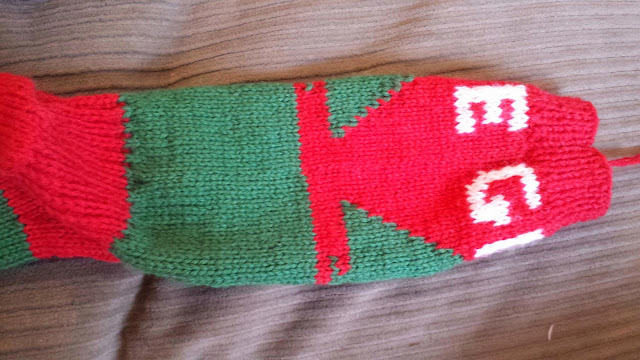
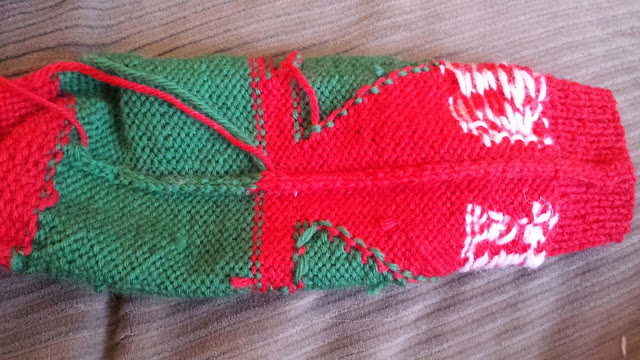
I used a mattress stitch to close the stocking starting at the cuff and working down to the heel. I first did this technique on Keith's sweater and then on my patriots hat and it works really nicely. I'm glad to see my skills have improved since I made Gracie's mom's stocking.
Before stitching the stocking closed |
After the mattress stitch |
The WS of the fabric - look at that sturdy stitching! |
Once I was done the stocking still required some blocking. I soaked the stocking for 20 min before laying it flat on my blocking mats. I didn't even need any pins!
Like Jenn's Stocking, this stocking was knit in KnitPicks Wool of the Andes. In the end, this project used 36 g/ 80 yards red, 9 g/ 20 yards white and 34 g/75 g green. I'm within a gram of each yarn from what I used in my original stocking. Talk about consistency! I used size 3 (3.25 mm) knitting needles.
I am so thrilled to help keep this tradition alive. I'm ready and willing to make more as the family grows! (Although I am sticking with new spouses/children... I couldn't keep this up for the rest of the clan, there are a gazillion cousins!)
Sunday, February 16, 2014
Dyeing Yarn with Tea
Thursday, February 13, 2014
Ribbed Newsboy Visor Hat
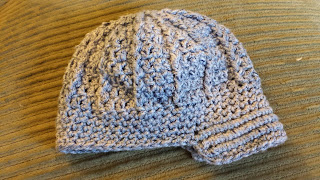
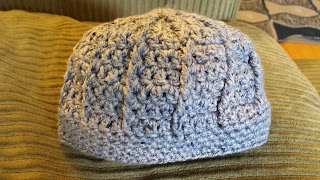
When I found the Ribbed Newsboy Visor Hat crochet pattern I fell in love with the the cute boyish look. I knew immediately that this was something I wanted to create for my newborn son! I grabbed the Araucania Tolhuaca Solid remaining from Lucky's baby blanket and a size H (5 mm) crochet hook and set off on the 3 month size hat. In the end, the hat consumed 68 g, 82 yards of yarn. The color is called Denim so I'm expecting it to look like a blue jean newsboy hat.
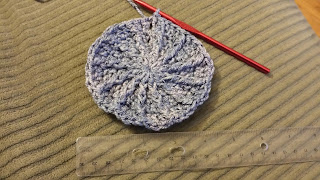
This is my first time doing a textured sort of stitch. The ribbed effect is achieved by alternating where you make the DC stitch from, and I think it is pretty cool!
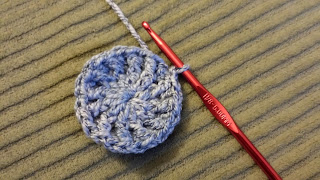
I stated the project with a magic ring because this is my preferred method of starting circles.
Unfortunately the instructions for Round 4 and Rounds 5-10 are written identically, but round 4 involves a 12 st increase from round 3 whereas rounds 5-10 remain constant. I think the difference is that in round 4 you DC and fpdc into the SAME stitch and in rounds 5-10 you fpdc into the NEXT stitch to not increase. It helps to note that you are always fpdc'ing around a previous fpdc stitch.
I love how the "ribbing" radiates out. After the first 4 rows, my piece measures 4.5" in diameter.
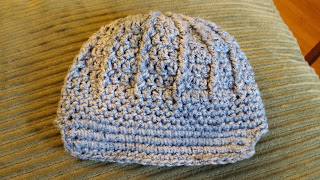
Without the visor, the hat measures 5.25" deep and 14" circumference. The material is fairly stretchy, so there is some ability to block this bigger if necessary. I knew from the get go that I didn't want to leave this as a beanie (although it is an adorable beanie) and wanted to make the visor.
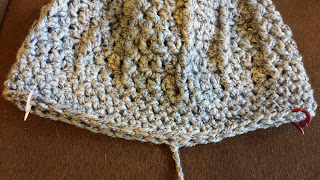
I used removable stitch markers to designate where I was going to work the stitches for the visor. I figured it was better to plan it out ahead a bit. I liked the length of the visor after the 6 rows as written. The visor is about 1" in length, equivalent to the 4 row sc brim of the beanie portion of the hat. When making the final SC round around the hat, I continued across the front of the brim and then fastened off in the corner of the brim.
I think this hat is totally adorable, and I cannot wait for my little one to be born so I can try it on him! (I finished this hat exactly 1 month before my due date!)
Sunday, February 9, 2014
Handy Tip: Keeping Your Place in Charts on Your Computer Screen with an Elastic Headband
I have a magnetic chartkeeper that I purchased which is wonderful for keeping track of where I am when I'm doing complex colorwork or lace knitting. The problem with this device is that it requires that I print out all of my charts. What if I want to save paper and work off of a chart while it is on my computer screen? Well I have a handy tip that can help!
I placed an Elastic Headband around the screen of my Chromebook. I can now move the chart in relation to the headband to keep track of my progress while knitting. After each row, I just move the chart down one row. (Alternatively you could move the headband in relation to the chart, but this is based on personal preference.) This solution is simple, easy and saves paper! I hope you find it as helpful as I did.
The displayed chart is part of the LAB Baby Christmas Stocking. Learn how to make your own knitting charts in Excel to create your own charts on a computer.
Friday, February 7, 2014
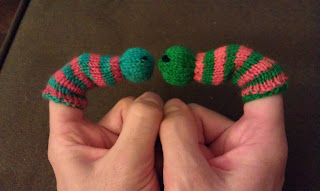
Worm Finger Puppet Favors for Babies at a Shower
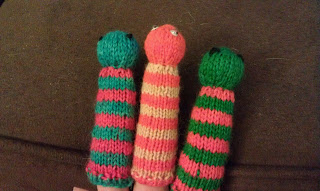
Two baby girls, 10 months and 14 months, were going to be at my baby shower. Since I knew that this would require a lot of patientce, I thought it would be fun to give the mommies a new little toy to help distract the little ones. I used my own design, the Worm Finger Puppet Knitting Pattern.
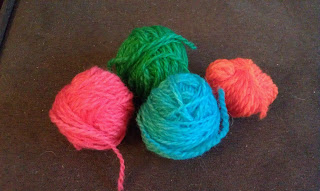
Rather than weighing the colors individually, I decided to weigh them as a group to get a sense of the total yardage required for two puppets. I used Palette yarn handdyed in Blue, Pink, Orange and Green (~21 yards total for two puppets) and size 1 (2.5 mm) knitting needles.
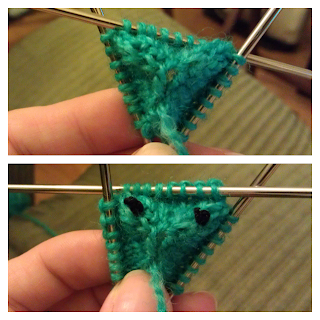
Since these puppets were for babies, I didn't want to glue googly eyes to the outside. I decided that a French Knot would be a safer alternative. Of course, I would need to learn how to MAKE a French Knot first. I used some scraps of Gloss Lace yarn, but I probably should have used Black Palette so the knot would have been bigger the first time around.
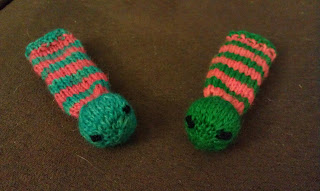
My gauge is a little bigger than the first worm that I knit (the design), so I knit a total of 5 cc stripes before making the ribbed edge and binding off.
The finger puppets were a hit! Both of the babies smiled and tried to immediately eat the puppets. If this isn't child approved then what is?
Wednesday, February 5, 2014
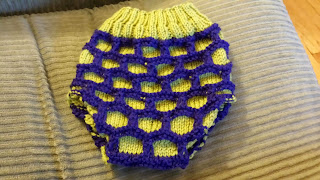
Turtle Butt Diaper Soaker
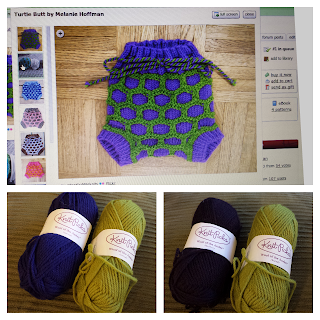
Turtle Butt is possibly the most darling diaper soaker knitting pattern ever. It really emphasizes the bubble baby butt in an adorable way. Plus, if you make the soaker out of 100% wool it can be waterproof and wick wetness away from a leaky baby!
I considered two different color options of worsted weight KnitPicks Wool of the Andes for this pattern, Avocado as the MC and then either Hyacinth or Blackberry as the contrasting color. I really couldn't decide between the more vibrant (Hyacinth) or muted (Blackberry) option, so I turned to the ChemKnits Facebook followers for help. They did not disappoint me, and encouraged me to select the more vibrant option.
Looking at the associated Ravelry board, I decided to make the size Small. My baby boy was projected to be big, so a 0-3 month (x-small) might not fit him very long. A 6 month size may have some more use. Plus all accounts on Ravelry that used KnitPicks WoTA found under 50g of each color was required, so I know that I'll have enough yarn.
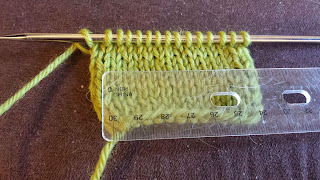
I checked my gauge on size 6 dpn's. 10 sts/2", I think I'm good! I used size 4 needles where directed in the pattern.
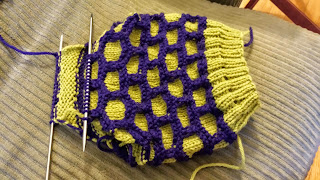
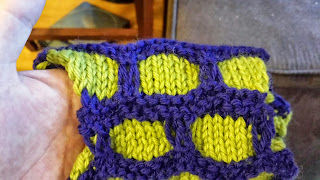
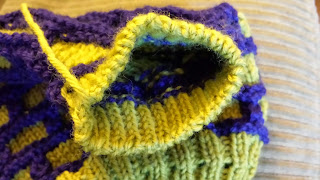
I've gotten pretty used to the kitchener stitch, but I've never done a Garter Graft before. I was tempted to just turn the piece inside out and do what I know. Turns out, it really is just the reverse of what I've done before so it wasn't so hard. (Phew!) Can you even tell which row is grafted in the picture below?
I have no idea how big a baby's leg (thigh) is around, but I hope after making the ribbed leg openings there is enough space to help hold this turtle butt onto the baby.
When I read the instructions for the Grafted bindoff I was really confused. I missed the part of cutting the yarn and using a yarn needle. Thankfully the pattern links to a video that shows how the technique works. It does give a very nice clean edge for a ribbed product.
I created a twisted cord for the tie by twisting one strand of MC and CC and then letting them wrap around each other. The cord (4 ft - selected by the amount of MC remaining at the end) is too long, but I'm waiting to cut it down to size until I can try this diaper soaker on my baby. (In its current state, see first picture in the post, it could be a safety concern.) In the end, this pattern consumed 42 g/93 yards of avocado (MC) and 33 g/73 yards of hyacinth (CC).
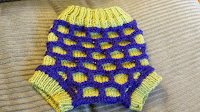
The front (left) and back (right) of the turtle butt diaper soaker.
At the time of completing this project (Oct 2), I think this will be the last thing that I make for my baby before he arrives!
Subscribe to:
Posts (Atom)