Monday, March 29, 2010

Golf Buddies


I found the pattern for this Golf Buddy by Amalia Samios and thought it was too cute to NOT make as a stocking stuffer. (NOTE: The pattern is available for free download at Ravelry, but you will need to make a free account to be able to view the pattern.) I don't think that this is something a golfer would ever have a practical use for, but I'm hoping that it will get a laugh or a grin. It was a great, short project that can use some of the billions of yards of remnant wool I have around the house.

Materials Used:
Size 4 dpn, Remnants of worsted weight wool.

My modifications to the pattern:
  • In the golf ball section, I knit this body in the round versus flat, eliminating the seam at the end.
  • For the main body rib pattern: K2,P1 until last 2 sts, K1, P1.
  • The pattern was a little ambiguous about the length of the main body rib pattern. "Repeat until 42 row pattern" could mean 42 rows of the new ribbing, or 42 rows total in the project. The diameter of a golf ball is 1.7 inches. To fit 3 golf balls in this buddy, you would need 5.1 inches. At 42 rows with the cuff uncuffed, the length was only 5 inches. After 10 more rows, the length with the cuff should be sufficient for three golf balls.
Now I had trouble finding golf balls to go along with this buddy. I don't know what makes one ball different from another, but I did find a bunch of novelty golf balls on Amazon.


Saturday, March 27, 2010

Spiders Away!

When decorating for Halloween last year, I cut out a bunch of spiders out of construction paper to hang in the window. I got to thinking... what would happen if I knit a spider? I have been going through a phase of designing insect knitting patterns, but I think that with each one I make I see how I could reasonable construct another one.

Materials
  • Knitting Needles: 4 dpn Size 1, (2.5 mm)
  • Yarn: Remnants of KnitPicks Palette Yarn (Fingering weight) in Black
  • Gauge: Not important for the completed project, but you want to knit tight enough that you will not see the polyester stuffing.
  • Misc: Toy stuffing, yarn needle, Gardening Wire or pipe cleaners if you'd like to make the legs bendy.

  • Finished Size: Approximately 2" x 3.5" with the legs bent. 4" wide with the legs straight.

Body Construction:
(Starting at the tip of the head.)
1. CO 6 sts in Black. Join to knit in the round and knit one row.
2. Kfb across - 12 sts
3. K across
4. Kfb across - 24 sts
5. K across
6. K across
7. *K6, K2tog* repeat 3 times - 21 sts
8. K across
9. K2, K2tog, K5, K2tog, K5, K2tog, K3 - 18 sts
10. K across
11. *K1, K2tog* across- 12 sts
12. K across
Now starting the body of the spider.
13. Kfb across - 24 sts
14. K across
15. K1, Kfb, K8, Kfb, K2, Kfb, K8, kfb, K1 - 28 sts
16. K across
17. K1, Kfb, K10, Kfb, K2, Kfb, K10, kfb, K1 - 32 sts
18. K across
19. K1, Kfb, K12, Kfb, K2, Kfb, K12, Kfb, K1 - 36 sts
Rows 20-21. K across
22. K1, K2tog, K12, K2tog, K2, K2tog, K12, K2tog, K1 - 32 sts
23. K across
24. K1, K2tog, K10, K2tog, K2, K2tog, K10, K2tog, K1 - 28 sts
25. K across
26. K1, K2tog, K8, K2tog, K2, K2tog, K8, K2tog, K1 - 24 sts
27. K across
28. *K2, K2tog* across, 18 sts
29. *K1, K2tog* across, 12 sts
Stuff the head and body with polyester stuffing.
30. K2tog across, 6 sts
Pull yarn through the remaining 6 sts, weave in loose ends.

Set of 4 legs (make 2):
  • Cast on 24 sts
  • Transfer 6 sts to another double pointed needle, and work in I-cord for 15 rows. Cut yarn, draw through remaining sts.
  • Slip the next six stitches onto a separate needle. As before, work icord for 15 rows.

  • Continue until you have 4 connected legs.

Finishing:

Cut 8 pieces of flower wire (or pipe cleaners or other kind of wire) that are approximately the size of your legs. If the ends are sharp, then I highly recommend bending the ends with pliers. Insert one piece of wire into each leg.

I designed each set of legs connected so it would be easier to sew them onto the body evenly. Using the loose ends, sew the legs onto the body. Weave in loose ends.


Laying out the spider before the pieces are sewn together.


The spider with straight legs (right) or bent (left and middle). With the legs bent the legs can support the weight of the arachnid.

I'm making this spider as a decoration more than a toy. Be careful with the wire you use (or leave it out) if you want to let younger children play with this.

I am proud to add this spider to my set of knitted stuffed toys. If the Spider and the Fly were going to fight... which one would win?


The Spider plushie created from this pattern, and the fly plushie that was the first of my insect series.

--------------------------
Abbreviations Used in this pattern:
Kfb - increase by knitting into the front and back of a single stitch.
K - knit
P - purl
SSK - decrease by slipping two stitches then knitting them together. Alternatively, you could slip one stitch, knit one stitch and pass slipped stitch over.
K2tog - decrease by knitting two stitches together.


This this pattern was created by ChemKnits for your personal or charity use. This pattern is not to be replicated, sold or redistributed without permission from ChemKnits. © 2010 ChemKnits

Wednesday, March 24, 2010

Library Adventures - Colorwork

Today's library adventure books are not super related to one another, except for the fact that they both involved color in some capacity.


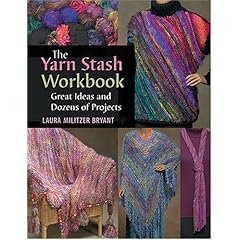
The Yarn Stash Workbook: Great Ideas And Dozens of Projects by Laura Militzer Braynt

This book starts out with a short introduction to color, different types of yarns how the same pattern can look different with different yarns. The ~22 patterns, although beautiful, are either slightly dated or would be more appealing to an older audience than a 25 yr old (I cannot decide which).

Since the projects are stash busters, it would be difficult to create two identical pieces. The patterns include scarves (~3), Toppers (~3), Accessories (4), Home decor (4), and wearables (8). The most interesting pattern is the Tailored "Everything" Jacket. It is not really my style, but so many textures and colors are mixed in without looking too stripy, and the overall effect is stunning.

The book is worth a read to get ideas for how to mix different yarns together without making it look like you are just trying to bust your stash. Worth a read, yes. Would I purchase it? Not for myself, although my mom would like some of the items a lot!


Mosaic Knitting by Barbara G. Walker

I love mosaics, and it wasn't until I picked up this book that I realized the term could apply to knitting as well. I have enjoyed doing color work, but I have, until this point, stuck to a Fair Isle method.

The designs in this book are varied, unique and beautiful. There are HUNDREDS of different patterns. It is not hard to imagine them becoming socks, mittens or even blankets.

This is a FANTASTIC reference. If I every do decide to make my own mosaic afghan (why do I always crave to make another afghan? I never finish them in a reasonable amount of time!) I will need to pick up a copy of this book for myself.

Saturday, March 20, 2010

Starfish


Ever since my parents moved to Florida, they have been collecting sea shells non stop. (It is pretty cute that they go on shell collecting dates!) I am inspired by the beauty of sea creatures, and I decided to knit a starfish. The pattern can be found in Amigurumi Knits by Hansi Singh, a book that has fantastic instructions and intermediate photos.

The starfish was shown knit in a worsted weight multi-colored yarn. I used fingering weight wool that I had dyed myself (see my purple and tea dyeing experiments) and used size 1 (2.5 mm) needles. The change in yarn weight was to produce a smaller product. I achieved a striped effect by alternating rows with three different colors of purple wool.

This pattern was fun to do. There were multiple pieces to knit, but they were not sewn together, stitches were picked up and then they were knit together. This made a very seamless (no pun intended) final product.


Happy Anniversary Mom and Dad! This one is dedicated to you.

Monday, March 15, 2010

Bee Aware!

I was contacted by a member of the Herb Society of the UK to request using one of my patterns for a charity event, Bee Aware! They plan to create a swarm of my knit bees to decorate a booth at a garden show. I am thrilled that one of my designs can contribute to this cause.

This initiative is to bring awareness to the fact that the number of bees has been declining all over the world. Herbs and Bees are beneficial to each other. The Bee Aware! page has information on what herbs you can plant to promote bees to come to your garden.

I hope to share a picture of the booth once the event takes place this summer.

Window Pane Golf Cozy


These may be for golf clubs, but they look almost like tennis racquets to me!

There are many golf club cozies available (see my pattern search), and I selected the Window Pane Golf Club Covers for a present. The two colored head makes it amenable to do in school colors. I decided to create two, but to leave out the number panel entirely. To make the covers distinguishable, I used an inverted color scheme. (I was also afraid that I may not have enough wool in each color to make two the same.)

I used Lion Brand Wool Ease Yarn in White and Red and size 7 double pointed needles for the cozies.

My readers will know that I loathe seaming, so I knit in the round whenever possible.
Modifications to the pattern:
  • After the first row, joined to knit in the round.
  • Cuff ribbing: *k2, p3, rep from * to last st, and p.
  • I then realized that I was working the RS of my project as the WS in the pattern. I therefore flipped it inside out after the 52nd row. Effectively changing the ribbing to [K4, *p2, K3* until the end of the row]
  • The Inc Row in the pattern is worked from the wrong side. I redistributed the 11 increases as follows based on my rib modification. Kfb, kfb, K2, *pfb, P1, K3* repeat 5 times, pfb, pfb, K3, pfb, pfb (47 sts)
  • For the body rows, on even # rows where it says purl, knit.
  • I eliminated the the number pannel entirely (since I don't know what number clubs the cozy recipient would want to use this for), and continued the slip stitch pattern across the entire row. (to make up for the seem, in the last stitches, S1, K1 S1.)
  • In the second cozy, I increased the sts to 48 sts so the window pattern appears uninterrupted.

Also note: A Bar increase is the same as knitting in the front and back of the same stitch. This was the first time I've seen that terminology. I always use Kfb (knit in the front and back) or pfb (purl in the front and back).

Thursday, March 11, 2010

The Design of the 14-Cable Hat

I had a lot of fun coming up with the concept, and then designing the 14 Cable Hat. I thought it would be worth dedicating an entire post to the design process.

I started with a pad of graph paper (thank you, Keith!) and a bunch of knitting stitch books. I went into my own library, and pulled out 99 Knit Stitches and my Knitting Perpetual Calendar. I borrowed Cables Untangled from the Cambridge Public Library. I photocopied all of the cables that I found interesting, trying to find a mix of "thick" and "thin" cables. I probably photocopied more than 3 dozen cables total.

To know how many cables I could fit in the hat, I first needed to decide how many stitches there would be. I measured my head (circumference ~22 inches) and calculated the gauge (9.5 sts/ 2 inches). I decided that the hat would stretch out a bit, and I wanted something tight fitting, so I settled at 100 stitches for the hat.


My worktable sure got messy!

Now that I knew I would have 100 stitches to work with, I started charting the cables I liked the most... by hand. As someone who has very little experience with cable charts, this was quite a process. I did not have any idea how I would share these charts, but I thought that it would be helpful for me to have a summary before I tried to put it into the computer. It was surprisingly easy to fill up the 100 stitches, and keep the # of thick and thin cables approximately even. Since my photocopies were from different books, I couldn't be sure EXACTLY how it would work, but I could have a reasonable guess.

When I was sketching the chart, I was not concerned about the order of cables. I left that for after I had finalized which cables I would put in the hat. I numbered each cable that I drew on the paper and on the photocopy so I would have an easy cross reference.


I was afraid that I would lose this piece of paper and my work, so I took photos of it during my progress to "backup" my work. I didn't think that the pencil markings would show up if I tried to photocopy the page.

I took the photocopies for the 14 cables I selected, and arranged them until I found a pleasing order.


Now I wasn't about to draw out the entire chart by hand. It would be so hard for me to share the patten with anyone else. Using the method from my Tutorial, I used Excel as graph paper and I downloaded the Aire River Design Knitting Font to complete my chart. As I still am a novice when it comes to stitch charts, I choose to label the cables with color in addition to the symbols to make the chart more idiot proof.

In terms of the actual stitch design, I tried to have the twists alternate between right- and left-handed (where applicable.) I also tried to alternate thick and thin cables, so the hat would still have a balanced appearance. I re-arranged the cables within excel, since it would be easy to save my progress between each iteration.

I cannot believe that I used to be intimidated by stitch charts! I cannot imagine trying to write this pattern out line by line... there would be so many mistakes!


The hat knit up easily, and the chart was easier to follow than I had expected.

Tuesday, March 9, 2010

Search for Golf Club Covers/Cozies Knitting Patterns

I am not a golfer, with the exception of the occasional miniature game. However, in thinking about summer projects, and projects that would work nicely for the people on my gift list, I thought about looking an area in this sport that would welcome a knitter's project.

I therefore bring you my search for knit golf cozies, golf club toppers, golf club covers or whatever you would like to call them. Protect your clubs, and have a bit of fun!
  • Fuzzy Long Covers - These have fuzzy tops with novelty yarn, and a long neck to cover more than just the head of the golf club
  • Golf Club Covers - These are classic looking, the color and pattern make them appear like a men's dress sock.
  • Diamante - A fancy, ruffled color with two color polka dotted head.
  • Argyle Cover - complete with pompom head
  • Black Cable golf club cover - There pictures are not directly on the pattern link page, but they are linked to at the top. As described, these are black, cabled but there are also shown with number charts.
  • Classic Ribbed - Linked to a golf club cover in a classic looking pattern from a magazine. With number charts
  • Golf like an Egyptian - These have a Zigzag pattern up and down the head, with a pompom on top
  • Fairway Fair Isle - These have a long neck, with a small region (think coffee cozy size) of fair isle at the head. Tangy!
  • Flower Garden - These also have pictures linked to. Different colored bobbles with a green neck give you a cute little flower garden. With numbers.
  • Grapefruit - Ribbed neck, polka-dot head. Cute and elegant. My favorite so far.
  • Girly Swirly - This one reminds me of a wine cozy without a bottom. It appears to be knit as a tube with the top drawn together with a draw string. There is a cute swirled rib pattern
  • Lion Brand Trio (Note, does require you to set up a free account). Cabled, argyle or ribbed. They are topped with tassels or pompoms. Have a classic look and feel to them. The link is to the cabled version, but they are all shown pictured together.
  • Yesteryear Covers - This is another old school pattern shown on the page. Long necks, stripes on the heads and tassels. Easily adaptable to highlight your favorite school.
  • Holey Hexagons - polka dot (hexadot) head with pompom. Ribbed neck.
  • Spiral rib golf covers - These also look to have different number of bobbles or something on the top of the head so you don't need a number to tell which club is which.
  • Two tone - There is a cable or bobble type element that is a contrasting cover. photos are linked. With numbers to identify the clubs.
  • Window Pane - The color work on the heads looks like a window (good title!) Very elegant. photos are linked. With numbers
  • Ribbed - no photo
  • Cover - Straight, not ribbed. With stripes near the head, but there doesn't appear to much differentiation between neck and head.
  • Driver Cozy - Very nicely fitted to the driver head, designed with the golf club shape in mind. Ribbed neck. Since I will not have any golf clubs to test this on, this could be the way to go, or if my gauge is off, could be a disaster.
  • Leona's Pirate Lover Cover - You will have to scroll down to find the pattern under March 25, 2007. This is a skull and crossbones inspired golf cozy with a pompom on top.

Friday, March 5, 2010

14 Cable Hat Knitting Pattern

Last summer, Keith bought me a skein of alpaca yarn from a farm we visited on Martha's Vineyard. The wool has character. It is not uniform thickness, but is still rich and soft and a pleasure to work with. I wanted to create something fun to showcase the beautiful texture. I present to you the 14-Cable Hat; with a ribbed brim for warmth and 14 different cables around the crown. The 14 Cables include: Braided Cable, Mock Wavy Cable Rib, Cable with Bobbles, Traveling Rope, Claw Cable, and Little Pearl Cable.


Materials

  • 1 Skein 100% Island Alpaca, Herd Mates Worsted Weight, 2 ply. About 40 yards/ounce. 5.89 Oz ($41.23). This yarn is from the Fleece of Peitro, Luna, Afteil and Tranquility. With 5.89 ounces, I should have 235 yards (according to the label).
  • Size 6 round needles.
  • cable needle
  • tapestry needle or crochet hook to weave in loose ends
  • Gauge: 9.5 sts/ 2 inches, 7 rows/inch. in stockinette

The Pattern:
  • Cast on 100 sts on circular needles
  • Join, Work in a 2x2 ribbing pattern (*K2, P2* repeat) for 33 rows or until the work measures ~5 inches.
  • Starting with row 1 of the chart, work Rows 43 rows of the cable chart . I would recommend placing markers before each P2. This should make it easier for you to keep track which cable you are on. The cable portion of the project should measure ~6 inches.


    The 43-row cable chart. You should open this file in a new window to see the details better. Alternatively, you can view the chart in higher resolution over two pages in the following PDF file. Please note that this PDF is on over-sized at 11x17., not standard letter paper.

    Key for the chart. This should also be opened in a new window and saved. Cables are shown color coded in addition to symbols to facilitate the translations.

  • Next Row: *P2tog, P1, Yo, K2tog* repeat across. (80 sts) (NOTE: Because of a question received I wanted to clarify that this decrease happens AFTER you are done working the cable chart.)
  • Work in a 2x2 ribbing pattern (*P2, K2* repeat) for 8 rows (just over 1 inch)
  • Bind off, keeping with the ribbing pattern.
  • Weave a piece of yarn through the YO's at the beginning of the ribbing, and tie tightly closed.
  • Weave in all loose ends, and Enjoy!
Images of the Project:


Stitchmarkers placed in between each of the cables makes it easier to keep track of your progress.


Demonstration of how to weave a piece of yarn through the YO's at the top to cinch the hat crown together. I used blue yarn in this picture to illustrate it better, but you would want to use yarn the same color as the rest of your hat.


Different views of the 14 Cable Hat


Rotations of the 14 Cable Hat. See it from every angle!


When I was working on my sampler afghan, I hated the complex cabled squares. It would have gone differently if these cables had been charted, rather than reading line by line instructions. If you want to extend the cable chart beyond the 43 rows, then you need to make sure that you end on an odd number row (when you have 100, not 101 sts) before you begin the decrease/YO round.


This chart is extended to 49 rows. The extra rows are shown in Red.

I wanted this hat to be as functional as it is fun. I designed a large ribbed brim so I would be able to stay warm while waiting for the bus. I also knit it tight since I have had other hand-knit hats stretch out a lot.

References:-----------------------------
Abbreviations Used in this pattern:

Kfb - increase by knitting into the front and back of a single stitch.
K - knit
P - purl
YO - Yarn Over
K2tog - decrease by knitting two stitches together.
P2tog - decrease by knitting two stitches together.

CN - Cable Needle
Key to Cable Charts


This this pattern was created by ChemKnits for your personal or charity use. This pattern is not to be replicated, sold or redistributed without permission from ChemKnits. © 2010 ChemKnits

Wednesday, March 3, 2010

Drop Stitch Wine Bag

I love it when someone brings me a bottle of wine in a bag. This means that I now have a bag to bring to someone else when I bring them a bottle as a gift. I wanted to design something that I could whip up when I didn't happen to have an extra bag around. The drop stitches make this project knit up quickly, making it perfect for a last minute gift wrapping.


Materials Required

  • Miscellaneous remnants of machine washable worsted weight yarn in three colors.
  • size 3 double pointed needles (I like a tight gauge on my cozies)
  • Gauge: ~ 11 sts/2 inches; 17 rows/ 2 inches over stockinette
  • A wine bottle to check the desired fit. (Measured flat the cozy is ~5"x13")
  • Yarn needle or crochet hook to weave in loose ends
The Pattern

Row 1: Cast on 6 sts, join to knit in the round and knit 1 round even
Row 2: KfB across (12 sts)
Row 3: KfB across (24 sts)
Row 4: K 1 round even
Row 5: *K3, Kfb* repeat to end (30 sts)
Row 6: K 1 round even
Row 7: *K4, Kfb* repeat to end (36 sts)
Row 8: K 1 round even
Row 9: *K5 Kfb* Repeat to end (42 sts)
Rows 10-13: K across
Row 14: *YOx5, K1* repeat from * across
Row 15: Knit across the row, dropping the YO’s.(When you have completed this row you may need to pull on the end a bit to make sure things are lined up properly).
Rows 16-17: K across

Repeat rows 14-17 6 more times or until the project measures over 13 inches when stretched (so it will fit over a wine bottle when tied). Cast off and weave in loose ends. Use a ribbon or piece of yarn to tie the bag closed at the top of the bottle.


When not tied to the bottle, the dropped stitches look scalloped.

----------------------------------------
Abbreviations Used in this pattern:
Kfb - increase by knitting into the front and back of a single stitch.
K - knit
P - purl
SSK - decrease by slipping two stitches then knitting them together. Alternatively, you could slip one stitch, knit one stitch and pass slipped stitch over.
K2tog - decrease by knitting two stitches together.

YO - yarn over


This this pattern was created by ChemKnits for your personal or charity use. This pattern is not to be replicated, sold or redistributed without permission from ChemKnits. © 2010 ChemKnits