Thursday, March 29, 2012

January Mystery KAL (Knit-a-long)


I had so much fun with the Polaris shawl that I decided to join into Susana IC's January mystery knit along. She released the first clue on Jan 8, and I joined in on Jan 11 (plenty of time to finish before the second clue!)

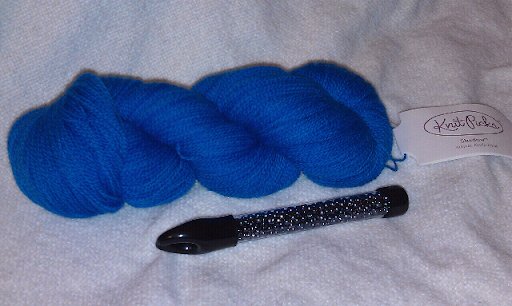
I had two tubes of Toho Round Seed Beads 6/0 'Transparent Rainbow Crystal' 8 Gram (this is my best guess at the color since the label isn't clear), so I figured that this should be enough beads for the project. The transparent crystal color looks great with the yarn. KnitPicks Shadow Kettle Dyed in Altitude (this version of Shadow lace yarn is discontinued.) I was initially going to use a white/pearl colored bead, but since this pattern is a mystery I didn't know how many beads I would need to finish the project.
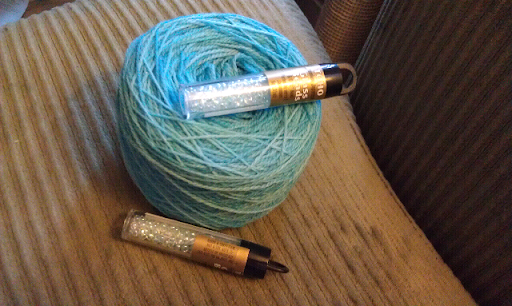


I think I started with 49 (48 g maybe) of wool. I know that the ball was only a little short but I forget to write down the final number. I will assume 49 g when I do my final yardage calculations.


Clue 1: I finished the first clue the same day that I purchased the pattern. This isn't so surprising since there are only 6 rows of the lace released. I was a little concerned about "nupps"" until I realized that they are just bobbles.

Susana IC designed the first shawl that I made. So far, the major difference between the two is that some of the shape of the hem is apparent from the knitting, where in Polaris it came more from the blocking. 43 g of wool left (*Note that I had gotten 2 sections into row 7 when I remembered to weigh the wool.)
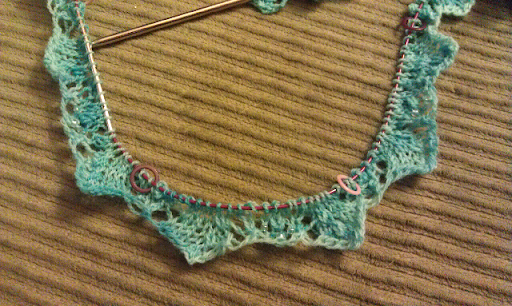

The end of clue 1.


Clue 2: Two minor disappointments from my first impression of clue 2. 1) I only get 8 more rows of the lace pattern, I was hoping that I would get more to work on. (This is what I get for doing a mystery project!) 2) There aren't any more beads in these rows. I love the beads I chose for this project, but if there were only going to be beads on the very edge, then I would have had enough of the white pearl ones.

Don't get me wrong, I still love this project. The suspense of working on it a little bit at a time keeps it fresh and exciting. The nupps are going to look fantastic when it is stretched out and blocked. 37 g remain after this clue has been completed.
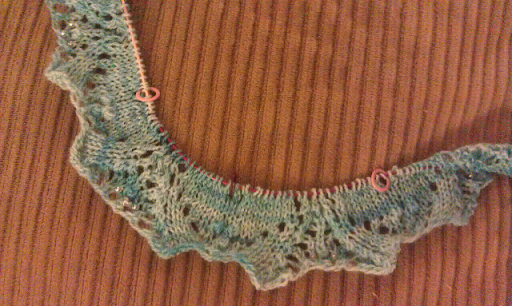


Clue 3: Only 8 more lace rows. No more beads or nupps for these new rows. I read on one of the message boards that there are 100 beads (if you leave nupps as they are) required for this project. I am making the medium size, so I've only used 39 beads thus far. There will be some more beads coming up!

31 g remain after clue 3 is complete. Yikes!!!
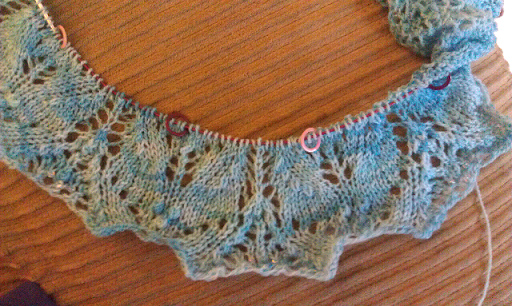


Clue 4: 14 new rows, wahoo! These rows basically repeat some rows we had previously (not a complaint, just an observation.) There were no more beads or nupps, so maybe they are along the bindoff edge like in Polairs? 24g of wool remaining at the end of this clue.
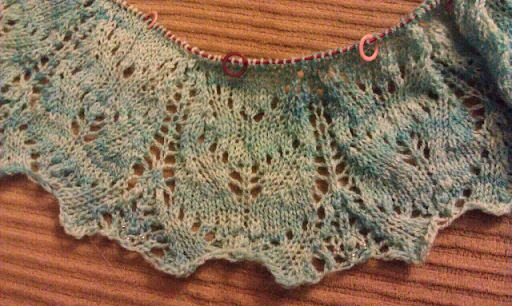


Clue 5: It is time for short rows! This is the first clue that I didn't start and complete on the day I received it. I was working on another shawlette, and I was almost done with the short rows. I decided that I should finish that project before working on clue 5.

I have been looking at the spoiler thread to try to decide if I want to use beads or nupps on the short rows. I know that there will be beads at the end, and it would be nice to have some in the middle, too. I am going to try alternating beads and nupps, even though I have not seen a photo of this yet. The center nupp (the first one in short rows) will be a bead. Each nupp row had one nupp and one bead (i.e. row 5 the first was a nupp, the second a bead to keep up with the alternating..

When I made my last nupp on either end 3 stitches remained on each side. I did two more rows so I could complete the nupp on the purl side.
14 g remain at the end of clue 5. I will have no problems with yardage on this project! I just hope the shawl will be large enough.
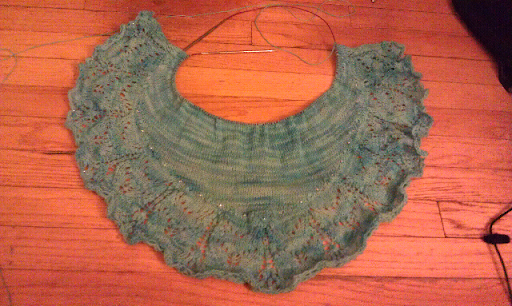
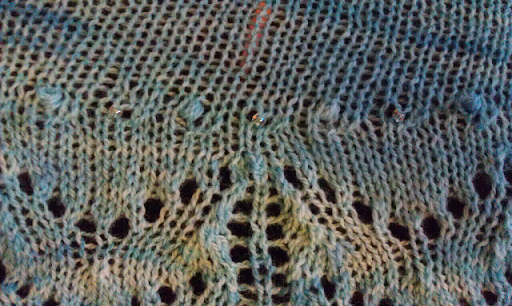
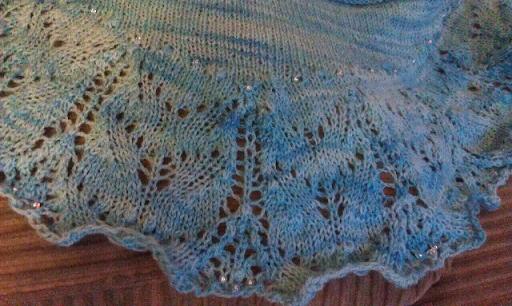


Clue 6: The end! 12 g remain. 37 g (or ~325 yards) were consumed in this project. I used less than one tube of beads (maybe 50/60% of one tube.)

I think I could have made the large version with the amount of yarn I have left. I prefer the size of my polairs to this shawl, but I have not blocked it yet. I know it will grow with blcoking, but the bind off is tight (per pattern instructions) so that won't grow too much. I expected to have a lot less yarn left over....

Unblocked (but stretched with my feet) the bind off edge (no sides included) is 34 inches.
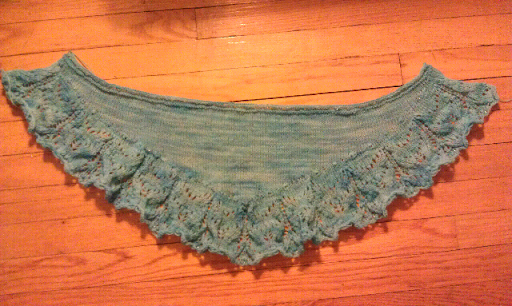

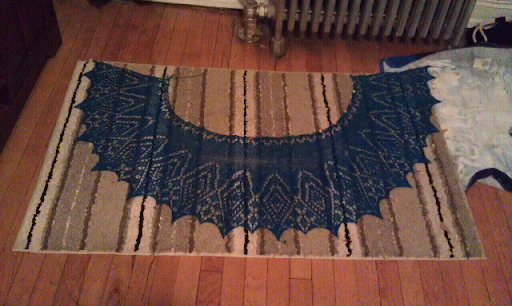
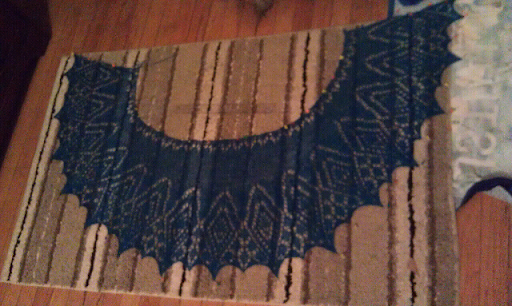
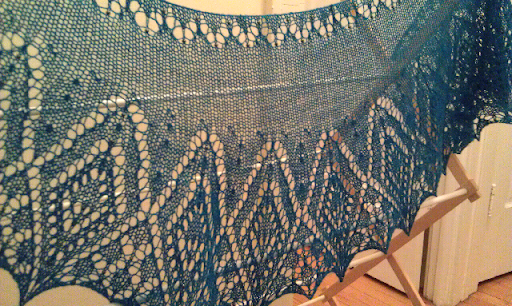
Finishing: This time I remembered to weave in my loose ends before blocking. Once the shawl was blocked, I was no longer concerned about the size. Sure, a little larger would be nice, but it is definitely not too small to be useful.
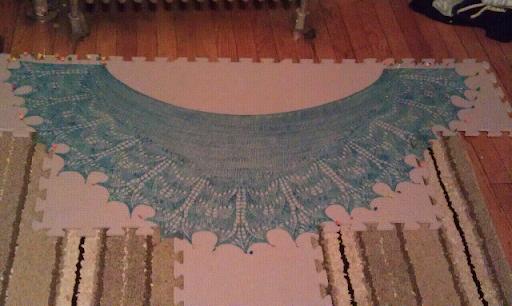

I wasn't sure how I liked the top edging. I liked the simple beads, but I thought the K and P rows were asymmetric in respect to the beads. Once the shawl was blocked, this was no longer an issue and I am so happy I followed the pattern instructions!
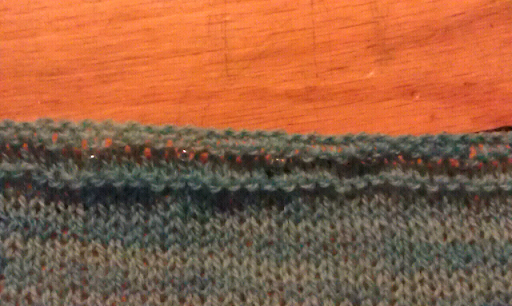
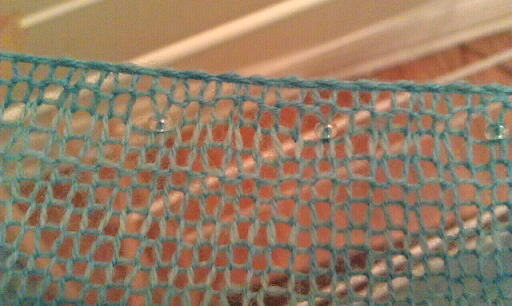
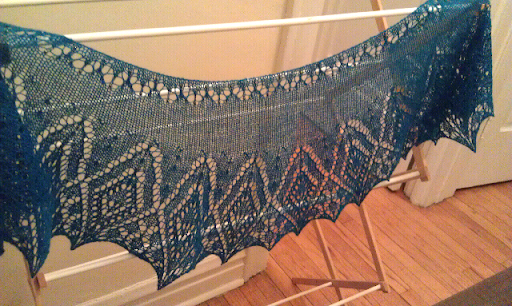
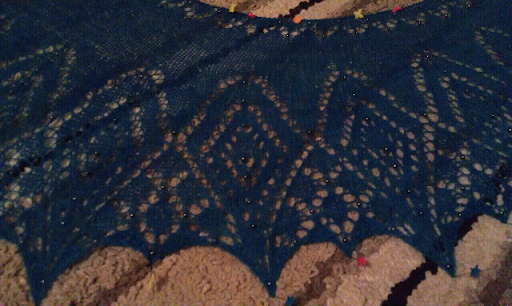
The top edge of the shawl unblocked (left) and blocked (right). The beads are really subtle.

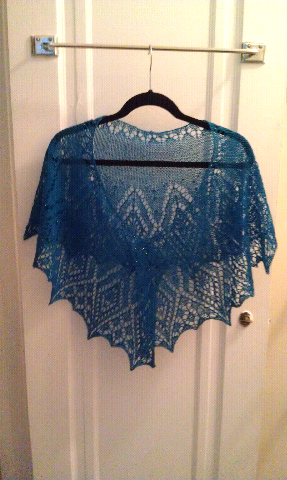
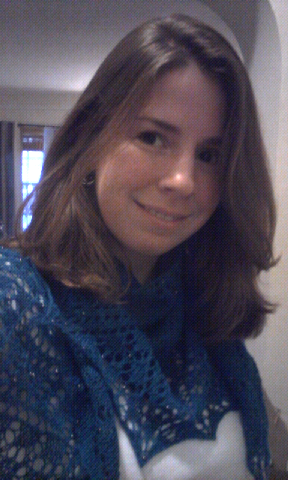
This shawl is stunning. I had some slight doubts about the design while I was knitting, but once it was blocked I fell completely in love. (The doubts weren't about the beauty of the shawl, but more about whether or not it was my taste.) I still don't know the name, but it reminds me of spring and tulips.
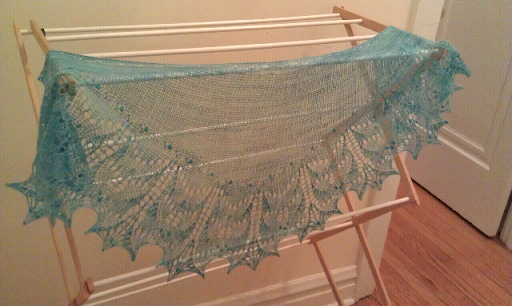
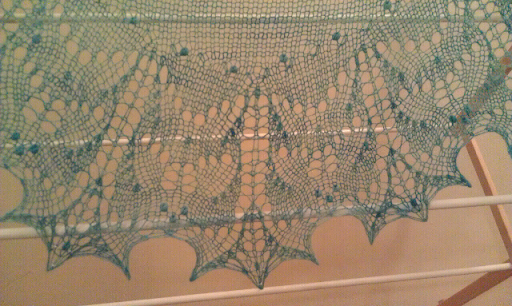
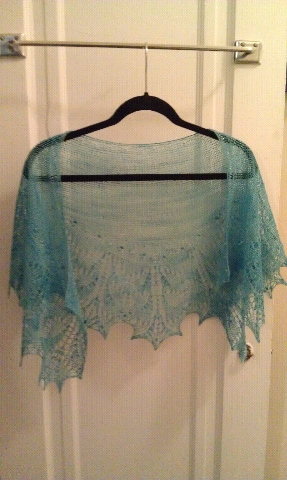

What are the benefits of a mystery KAL? (Besides the fact that it is fun!) You get the pattern at a reduced price. The pace is slow so you don't get frustrated by a project, and are able to work on other things in between. I would definitely make this shawl again, and I hope there is another mystery KAL soon!

Monday, March 26, 2012

Polaris


The feather and fan scarf took me three years to complete. I was hesitant to start another lace project, but I am so attracted to many lace patterns that I knew I should just bite the bullet and get started. (I also had a positive experience when I knit a lace doily.)


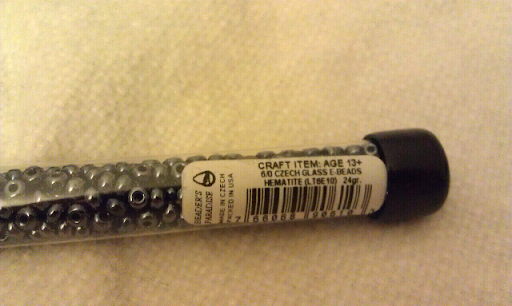
For my first lace shawl, I selected Polaris designed by Susanna IC. I had a skein of Knitpicks Shadow Lace Atlantic Kettle-Dyed and 6/0 Czech Glass beads in Hematite. I started with a 24g of beads and I used over 75% of them.


My ball of yarn was short (I forgot to record the starting number, but I think it was around 47 g) so I was very concerned about running out of yarn. My gauge was a little small, but given my yardage concerns I decided to proceed. I used the twisted loop cast on method onto size 10 needles and then purled 1 row (with size 7 needles) before starting the charts.

Some notes from while I was knitting
  • Before starting row 25 of the chart I only have 27 g of wool left... I'm getting a little nervous that I may run out of yarn. since I am not close to 50% done with theproject.
  • After the lace chart (before the short rows), I had only 13 g of wool remaining, so I decided that I needed to make some modifications to reduce the amount of yarn I would need for the rest of the project. On Row 44 I added a double decrease to each repeat. (reducing 30 sts) Just in case this didn't work out well, I put a safety line in so I could frog the project without redoing all of the lace. Unfortunately, I forgot about the markers as I added the safety line, so the markers I started out with ended up attached to the safety line, too.

  • I did some calculations on how to do the short rows, and I ended up with: K111, turn. P 11, turn. K10, ssk, K5 turn. etc. (adding 5 on each round)
  • I was going to end up decreasing too many stitches (even with my careful calculations), so when there were 46 sts left to go on each side of the short row, I knit 7 past the ssk or p2tog. I ended up with the same number of stitches at the end of the short rows as was indicated in the pattern.
  • After the short rows, I had 7 g left.
  • After top lace chart, 4 g
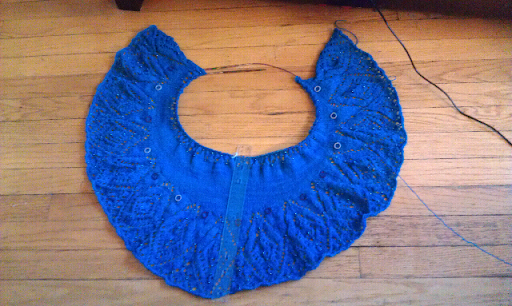
  • After bind off 3 g. Could I have made it? Maybe, but I really like the way the shawl came out. It is pretty small right now, but I haven't blocked it yet.
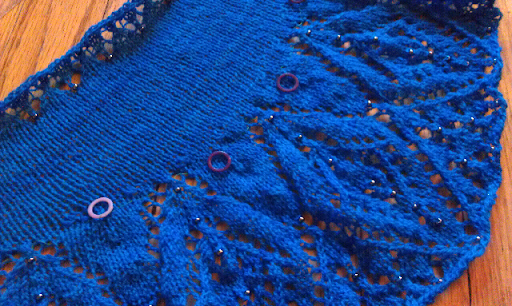
Blocking is definitely necessary for this project. As you can see from the following pictures, this doesn't look very delicate yet!


I used my grandmother's point protecters to keep the stitches from slipping off when I wasn't working on the project. The rhythm of the lace pattern was really easy to find, and it went really fast. The slowest part about the lace was adding the beads individually. Once I started the short rows, the project sped up considerably.


I forgot to weave in the loose ends before blocking (because I was so excited to stretch it out.) It ended up not being a problem this time, but next time I will make sure I don't forget to take care of this important detail first!


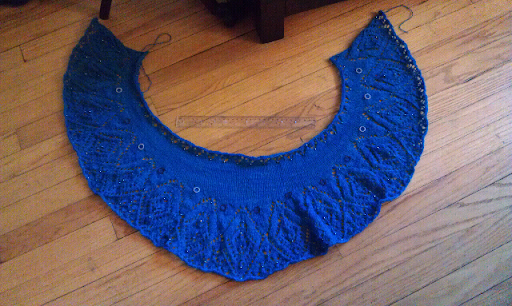
I need to get a non-clear ruler so you can see it better next to projects to get a sense of scale. You can barely see the ruler on the rug above the top edge of the scarf below. You cannot really see it at all on the above picture when it is on top of the shawl.


It is STUNNING! I could not be happier with how this shawl came out, and I cannot wait to start my next lace project.


P.S. I have a funny story about this shawl. I wore it to a bar for my friend Andy's 30th birthday party, and a stranger stopped me on the way to the bathroom. She pulled me aside to ask if I knit the shawl myself. When I replied that I had, she got all excited and was complementing the bead work. I was able to give her some pointers, and then we went on our way. This is the first time I have been pulled aside about something that I made myself!

Friday, March 23, 2012

Knitting Chart FAQ's

I get a lot of questions here at ChemKnits and on my YouTube channel. Early this year I received a first... a Video question! Glittermama posed several knitting chart questions in her video, and in ChemKnits comments. I thought it would be worthwhile to assemble all of these questions and answers into one post since other people may have similar questions about charting, gauge and the size of your finished project. Glittermama and Anonymous, I created this post for you!

Here is my video response to GlitterMama's Question:


Knitting Chart FAQ's:
  • How long does it take you to design your charts? The time it takes for me to produce a design depends greatly on the project. When someone asked me to design a Celtics Knitting Chart, I was able to produce a few versions in 1-2 hours. Designing my Christmas Stockings took months because I needed to coordinate many different charts to get something I was happy with. (This also took longer because I had to design the stocking itself.)

  • Do you design charts with an intended project in mind? Not always. This is addressed a little in my video response. Sometimes I have already designed a chart (such as the Red Sox B) and then when I want to incorporate it into a project I design the item (such as the Fenway Mitts) around the item I have already charted. In other cases, (such as my Ombré Hat) I first determine a basic pattern for the item (i.e. the generic skullcap) and then I draw the charts to fit within that design. (My Christmas Stockings all have the same core, and I design the chars to specifically fit within the pattern parameters.)

  • Does the size of your knitting chart determine the size of your work? No. It does not matter if you use big graph paper or tiny graph paper, the physical size of the chart will not change the final knit item. The important metric in a knitting chart is the number of stitches in the chart. The more stitches in the chart, then the larger it will be on the final garment. Even then, it does not determine the size of your final project. Your GAUGE (how many stitches and rows/inch of knit fabric) determines how big your chart will appear. If your chart is 25x25 stitches, this will be a lot bigger when made out of bulky weight yarn than it would be out of fingering weight yarn. Considering your gauge is critical when designing for a particular project.

  • Are stitches square? How does this affect knitting charts? This is another question about gauge. This also depends on your gauge. For some people with certain yarns, your stitches can have a square shape (your #rows/inch = #stitches/inch.) Usually knitting graph paper has stitches be wider than they are tall to make your chart more representative of the final knitting, but since this can depend on the gauge of your final project. For example, I used the same snowflake chart in both a knit square and in my Christmas Stocking. Because my gauge was different in both projects, it was a bit wider than it was tall in one instance, and much taller than wide in the second. For some projects you may not care if the final proportions are off, but this is why patterns always tell you to check your gauge!
  • How do you determine the size of the chart you want? Whenever I am making a chart for a particular project, I always start with how many stitches do I have to work with? For example, the generic skullcap has 100 sts x 33 rows between the ribbing and crown decreases. If I want a chart to go around the hat (as I did with Ombré) then this is the space I would start working with. BUT if I wanted a logo to fit on one side of the hat, then I would want it to be less then 50 sts wide so it could be visible on one side of hat, reducing my work area. If I want the logo to take up a smaller region of the hat, then this reduces my chart stitch space even further. If it turns out that the number of chart stitches is too small to get your intended design, then you can reduce your gauge to increase the number of stitches in the hat, giving you more to work with.

  • Should I consider gauge when I design my chart? Absolutely. This is a continuation of the previous example. When I was designing Rosalie's iPad case, I wanted a 10"x8" final product (20" circumference). My gauge 22 sts/4 inches; 18 rows/3 inches would give me 110 stitches by 48 rows. I used this as the starting area to design the charts for the iPad case. The generic skullcap has a gauge of 5 sts/inch and 7 rows/inch. The 100 stitches gives the hat a circumference of 20 inches. If you wanted to knit at a tighter gauge, say 7 sts/inch, then you could have 140 stitches to create a similar sized hat (you would also have to adjust the number of rows.) The more stitches there are in the project the more space you have for your charts.

  • Is it hard to design knitting charts? Not at all! Find some graph paper and start sketching, any design you make is a knitting chart. Alternatively you can use the tutorial that I created to help you create knitting charts in Microsoft Excel.
Note that the questions and answers in this post refer to colorwork knitting. Lace and cable charts are not specifically addressed at this time.

I hope that these questions will help you as you move forward to design your own knitting charts!

Thursday, March 22, 2012

We’ve Got You Covered: 25 Crochet & Knit Throws from Red Heart Yarn

In the past year, I have done a lot of work with AllFreeKnitting.com. I was thrilled when their sister site, FaveCrafts.com asked me if I would be interested in reviewing and promoting their free eBooks. FaveCrafts seems to dedicate it to all types of crafts, rather than focusing 100% on one genre. Today I am going to take a look at We’ve Got You Covered: 25 Crochet & Knit Throws from Red Heart Yarn.


I am a silly knitter. I love afghan patterns, and always find myself wanting to cast on a new project. I never seem to remember that they take me years! When I completed my first crochet project, I immediately wanted to cast on (is it still called cast on when you're talking about crochet?) an afghan. I was excited to see what types of projects We’ve Got You Covered would have to offer.

According to the editors, this book contains 6 easy crochet, 2 easy knit, 15 intermediate crochet, and 2 advanced crochet throw blanket patterns. Immediately you can see a balance problem, 23 crochet vs. 2 knit blankets. Of course, it is hard to complain when this eBook is available for free! The patterns are divided into these categories in the table of contents, so it is easy for you to select a project for your skill level.

I am not even close to an experienced crocheter (I really only know how to double crochet), but I wanted to look at those patterns first. The Crocheted Amish Quilt-Inspired Throw is a beautiful mix of striping and solid colored yarns. I would have thought that the photograph was of a quilt not a crochet item in first glance if I didn't remember I was in a crochet ebook. (Of course, the photo is too far away to see the stitch definition!) I fell in love with the Dresden Plate Crocheted Throw. There are multiple panels that have these 12 petal flowers in the center. With the right color selection this could have a real nice modern vibe.

I won't mention every single afghan here, but there are some that really stood out to me. The Delicate Stained Glass Crochet Throw looks like something I should add to my queue. It looks like a standard granny square afgahn, but there are stair-stepped edges that give it a different twist. I have never seen this type of pattern before, so I was very excited. (Plus I think I might be able to make it!) The Bold and Beautiful Catherine's Wheel Crochet Throw has amazing texture to it. There are solid and muilticolored yarns raidiating out from the center in a squarish zigzag pattern. This is another afghan that I would love to create! The Crochet a Fan Throw looks like stained glass (although I am not sure I can say this because another of the afghans is named after stained glass!
Finally, what about the two knit afghans? The Arrowhead Lace Knit Throw is a simple 4 row repeat that will give you something airy and cozy to cuddle with. (I would personally knit this with some kind of cotton. It looks like a perfect warm weather throw blanket.) The Knit Cables and Diamonds Throw reminds me a bit of my first knit blanket, but only because that also had a pattern of diamonds on it. This blanket has alternating columns of lacy diamonds and cables. It is very pretty!
As I finish flipping through We’ve Got You Covered I find myself in some trouble. I need to hone up on my crochet skills and get some yarn so I can create these patterns for myself! I am not the biggest fan of 100% acrylic yarn, but I will definitely keep an eye out on RedHeart patterns in the future.

Get free craft projects, ideas & special offers + a FREE ebook, “We’ve Got You Covered: 25 Crochet & Knit Throws from Red Heart Yarn

Tuesday, March 20, 2012

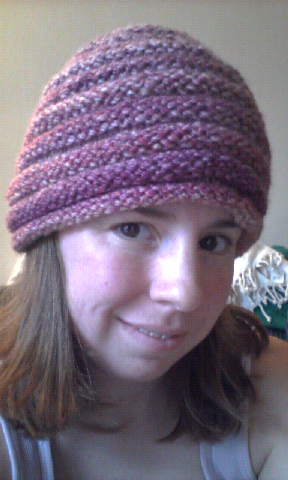
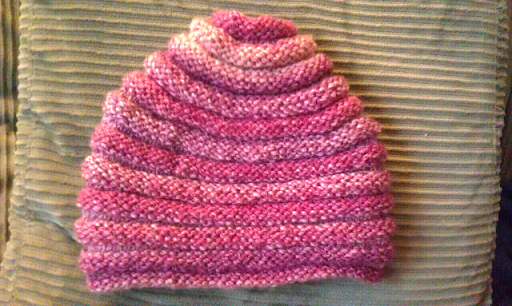
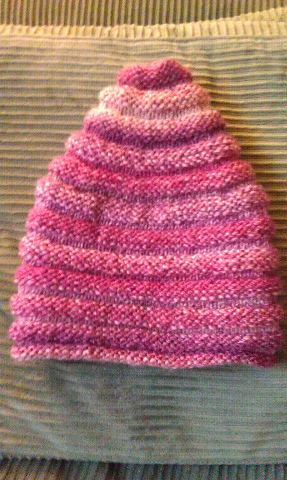
"Noro" Hat


James C. Brett Marble Chunky is a fun yarn with a great colorway. I thought it would be worthy of being the basis for a Noro Hat.
This hat is a Saartje de Bruijn design, and I have knit many projects from this designer in the past.


This hat consumed 91 g (155 yards) of yarn.

I still used size 7 (4.5 mm) knitting needles, but I decreased the co stitches to 75 since this was a chunky yarn. Therefore, when I started the crown decreases I skipped (rows 45-52) to where there were 75 sts.

I love that you K the first 8 rows so you get a bit of a rolled brim. This transitions seamlessly into the pattern.

This hat makes a great, simple project. The pattern is really easy to keep up with, and it would be a great project for someone when you are not sure how big their head is. The hat stretches and shrinks in a really fun way!

Saturday, March 17, 2012

More VIP Fibers Samples

This Thanksgiving, I got some other VIP Fibers samples as a present! Lucky me, I got to see samples from American Eskimo (like Indy!), Keeshound, Australian Shepherd and Coyote yarns.

Of the four samples, the consensus is that the Coyote is the softest. I happen to like the American Eskimo, and from the fur I have been saving I know it is going to be great!


How much have I saved? When I weighed my collection in early February, I had 4 g of fur. Sure, this seems like not very much fur for 6 months of ownership, but Indy is starting to shed a lot more. He is also much more amenable to long brushing sessions.

Wednesday, March 14, 2012

Amigurumi LadyBug - Simple Version


I wanted to design a lady bug amigurumi, but I was conflicted on the construction of the wings. Did I want my lady bug to fly, or to just sit and look pretty? Since I couldn't decide, I created one of each. In the simple version, the lady bug's spots are placed directly on her back. In the flying version, two wings are knit separately and then attached to the body. For simplicity reasons, I decided to publish each of these projects separately (but you will see many similarities between the two patterns.)

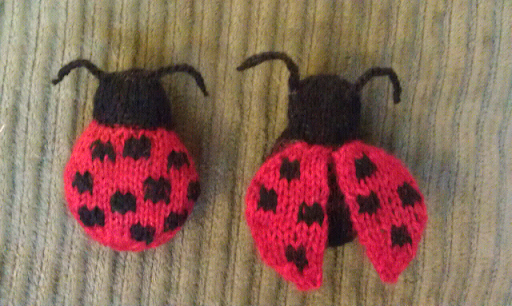
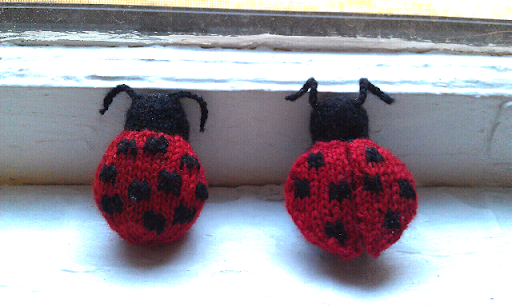
The knit amigurumi ladybugs: simple version (left) and flying version (right)

This knitting pattern will help you make the LadyBug Amigurumi - Simple Version. To make the LadyBug Amigurumi - Flying Version, see the complementing pattern.

The knit amigurumi ladybugs: simple version (left) and flying version (right)

Materials:
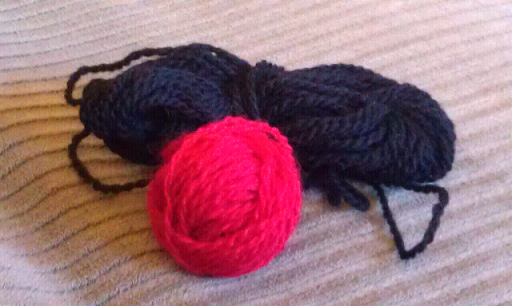
  • Fingering Weight Yarn (KnitPicks Palette in Black and hand dyed red; 1-2 g of each) (This project will work in multiple weights of yarn.)
  • Needles: Size 1 (2.5 mm) double pointed needles
  • Notions: polyfill stuffing, Yarn needle for weaving in loose ends. Crochet hook for creating antennae.
  • Gauge: Not Important for this project.
  • Finished Size: ~2" long

The body of the simple ladybug is constructed as a single piece with a red body and black head. The spots are added before the body is closed by embroidery with duplicate stitches.

Body Construction:
(Starting at the tip of the head.)
1. CO 6 sts in Black (MC). Join to knit in the round and knit one row.
2. Kfb across - 12 sts
3. K across
4. Kfb across - 24 sts
5. K across
6. K across
7. *K6, K2tog* repeat 3 times - 21 sts
8. K across
9. K2, K2tog, K5, K2tog, K5, K2tog, K3 - 18 sts
10. K across
11. *K1, K2tog* across- 12 sts
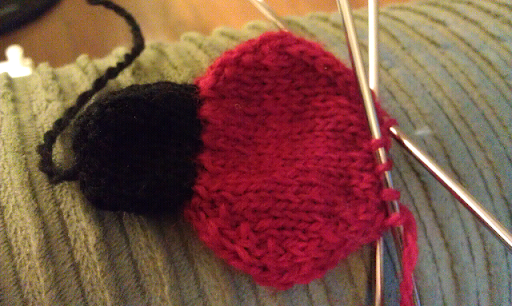
Now starting the body of the lady bug. Switch to Red yarn.
12. K across
13. Kfb across - 24 sts
14. K across
15. K1, Kfb, K8, Kfb, K2, Kfb, K8, kfb, K1 - 28 sts
16. K across
17. K1, Kfb, K10, Kfb, K2, Kfb, K10, kfb, K1 - 32 sts
18. K across
19. K1, Kfb, K12, Kfb, K2, Kfb, K12, Kfb, K1 - 36 sts
Rows 20-21. K across
22. K1, K2tog, K12, K2tog, K2, K2tog, K12, K2tog, K1 - 32 sts
23. K across
24. K1, K2tog, K10, K2tog, K2, K2tog, K10, K2tog, K1 - 28 sts
25. K across
26. K1, K2tog, K8, K2tog, K2, K2tog, K8, K2tog, K1 - 24 sts
27. K across
28. *K2, K2tog* across, 18 sts
29. *K1, K2tog* across, 12 sts
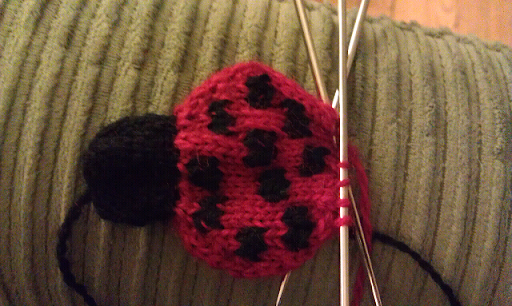
With yarn needle and black yarn, form the ladybug's spots with duplicate stitches on the back of the ladybug. Use whatever patter you like. I created the following chart as a guide, but I ended up using less 4x4 stitch spots on my actual ladybug.
Stuff the head and body with polyester stuffing. Take care not to over stuff!
30. K2tog across, 6 sts
Pull yarn through the remaining 6 sts, weave in loose ends.


Additional Finishing (Images are from the free toy butterfly knitting pattern):
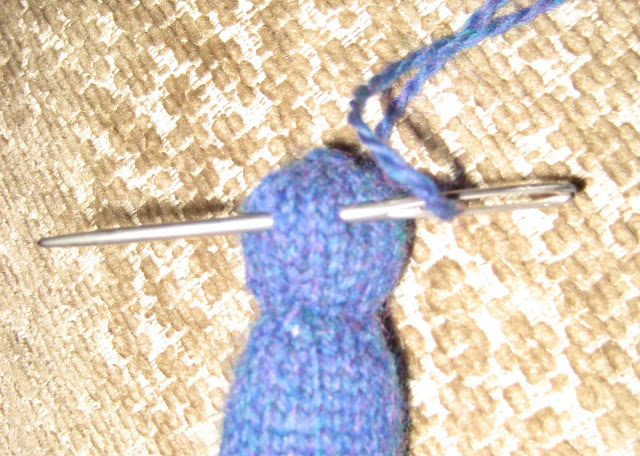
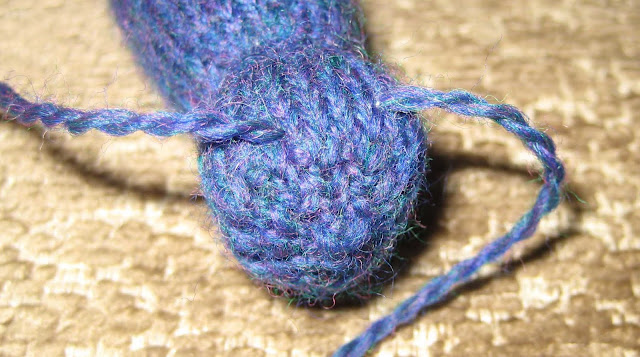
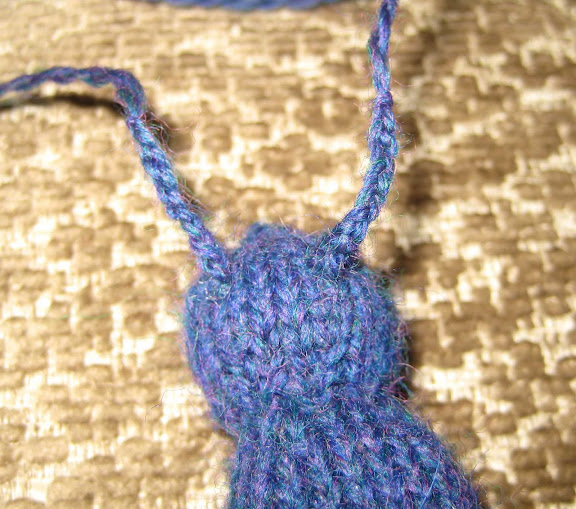
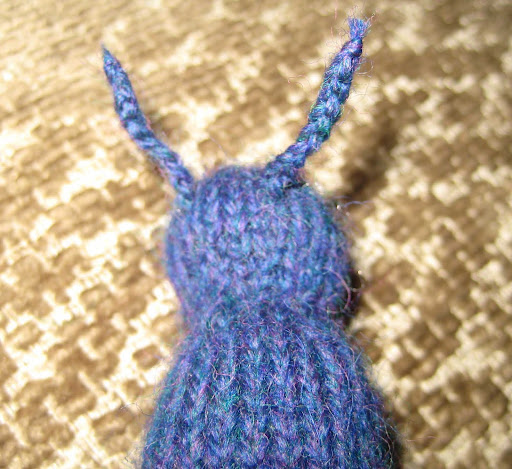
Cut a 24 inch piece of yarn (same as head color). With the yarn needle, insert into the ladybug head so the ends come out where you would like the antennae to be placed. Using a crochet hook, crochet a chain (using a knit stitch for the first loop) until you get the desired length for an antenna (approximately 0.5 inch). Draw the free end of the yarn through the last loop, pull tightly, and cut the yarn.


Placement of the antennae with the yarn needle (left) and how the yarn is placed before crocheting (right)


The antennae before (left) and after (right) the ends are snipped.

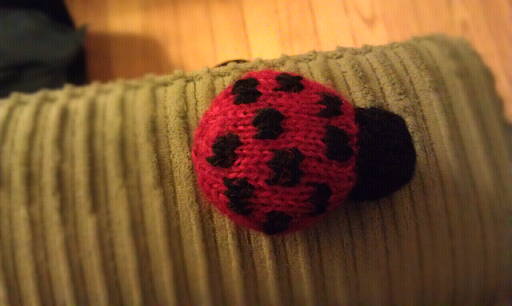
The completed simple ladybug

Optional Legs - I decided that I didn't want to put legs on my ladybug amigurumi, but if you want to add legs, I recommend that you follow the instructions from my caterpillar knitting pattern.

Enjoy your Ladybug! If you enjoy your simple ladybug, you may want to consider constructing the flying version, too. See below for some pictures of both version of the knit ladybug.


The knit amigurumi ladybugs: simple version (left) and flying version (right)

---------------------------------------
Abbreviations Used in this pattern:
Kfb - increase by knitting into the front and back of a single stitch.
M1 (Make 1)- increase stitch by picking up yarn between two stitches, twisting and knitting.
K - knit
P - purl
S1 - slip one stitch
SSK - decrease by slipping two stitches then knitting them together. Alternatively, you could slip one stitch, knit one stitch and pass slipped stitch over.
K2tog - decrease by knitting two stitches together.

This knitting pattern was created by ChemKnits for your personal or charity use. You are not to distribute or sell this pattern without the permission of ChemKnits. © 2012 ChemKnits