Wednesday, December 28, 2011

Time to Make a Sweater Again!


I made my first sweater when I was 18... and haven't made a sweater since then (I am 27 now.) It is time for me to give it another shot. I haven't been scared to make a sweater, but I have been afraid of my fluctuating weight and being unable to wear something I worked hard to finish. Enough worrying... Here I go!


6 balls of Swish DK yarn in Indigo Heather. (CotLin DK was recommended, but Swish has the same yardage/weight and I wanted the sweater to be wool.) but in both of these, 16 sts/4 inches is really loose gauge.... Both recommend 5.5 st/inch on size 5 needles....

My bust measures 35/36 inches, so I'll have to see how my swatch goes before I select which size (M or S) to make.

First swatch: Size 4 needles - cast on 28 sts . While I started knitting this I read that another knitter had to go up to size 10.5 needles to get the gauge (also not knitting with cotlin yarn). My gauge was 6 sts/inch; 8 rows/inch. (vs. 16 sts, 28 rows/4 inches.) Too tight. Switch to larger needles.
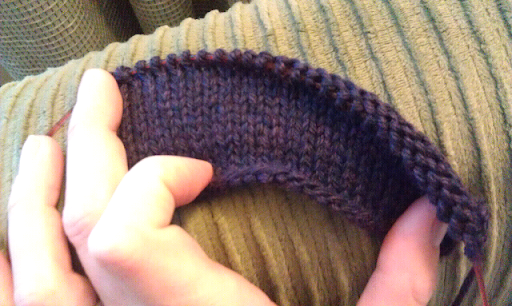
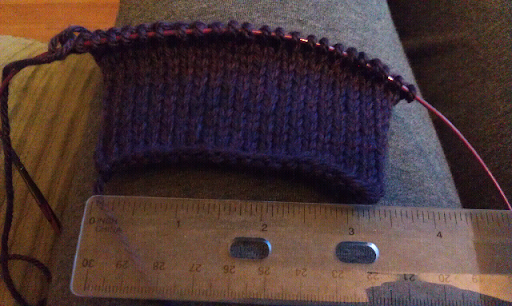
Second swatch - size 6 needles. Cast on 24 sts. 11 sts/2 inches; 7 rows/inch. still 1.5 st/inch too many.

Third Swatch - size 8 needles. Cast on 20 sts. Gauge: 14 sts/3"; 13 rows/2 inches. Could be blocekd to be 4/4.5 sts/inch 6.5/7 rows/inch. I don't want to go to much bigger needles... so I think I'll go with this one. Therefore, since I'm in between two sizes, I'll go with the M version.


I don't want to be afraid to rip out this project and start over if I'm not happy. On round three of the lacy neckband. It is a little loose for my liking, but it is hard to say how it will actually be since I am not that far in. If I am unhappy with the neckband once I'm into the yoke a bit, then I will cast on in smaller needles for the lace, and the switch to bigger needles for the rest of the sweater. Thankfully, the lacy neckband is essentially a thick rib, so once I got into the sweater a bit more it became a reasonable size.
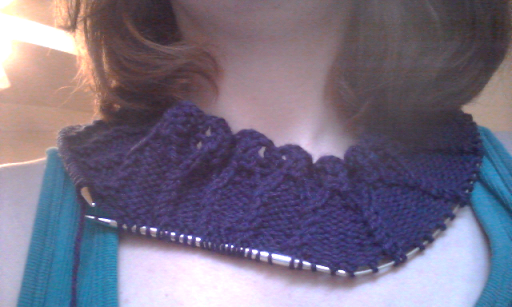


I LOVE the swish DK yarn. It is so unbelievably soft, it is an absolute pleasure to knit with.
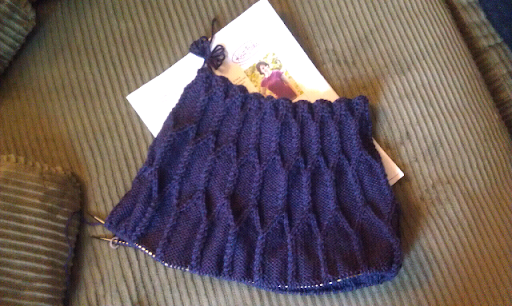

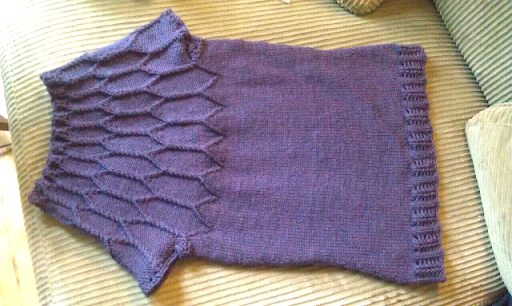
The yoke of the sweater.


It was a little hard to get into the rhythm of the lacy ribbing at the bottom of the sweater, but after the first round it was easy to keep track of the pattern. If I were to make this sweater again, I would start this ribbing higher up (maybe just after increase round 4... making sure I had the right number of stitches, of course.) I stipped the lacy ribbing after 6 repeats of the pattern because the sweater had reached the length I wanted.

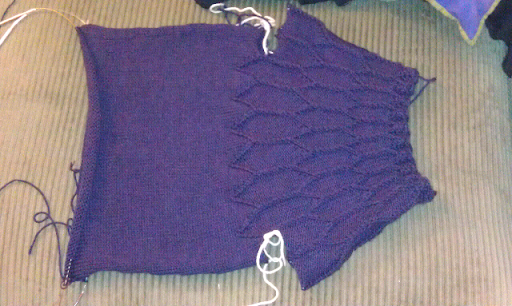
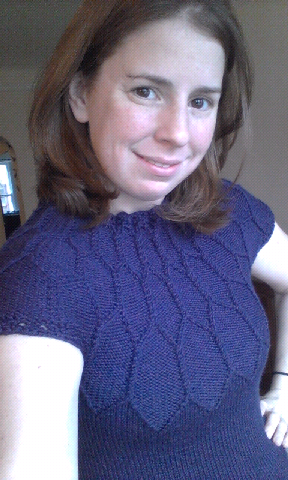
It has been really easy to try on this sweater as I went, and I've been amazed by how nicely it fits!
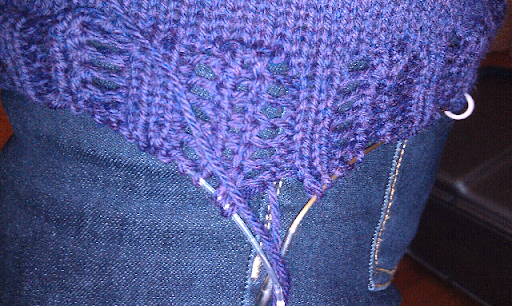

I finished the main body of the sweater on 11/1, but I was too tired to start the armholes, even though it would take a short amount of time to finish the whole sweater. Better to let the project take an extra day than to make some big mistakes! I did take this opportunity to weave in all of my extra loose ends.
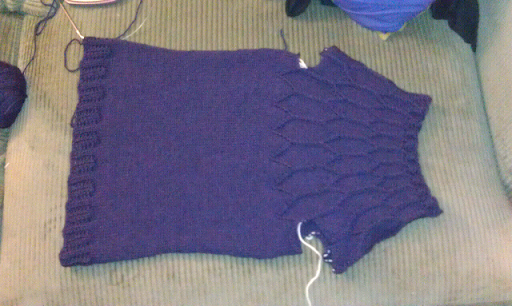


34 g remaining of the 6th ball. SO therefore I used 266 g of Swish DK yarn to complete this project.
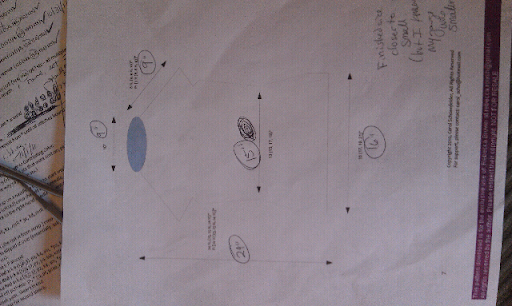

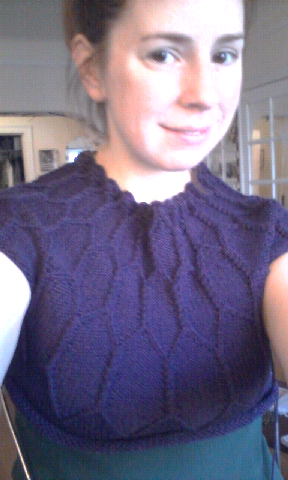
Finished dimensions of my sweater. The measurements are closer to a small than a medium, but this is what I wanted. Thank goodness knit fabric is so stretchy, because this sweater fits me PERFECTLY!

I cannot articulate how happy I am with this sweater. I have so much more knitting confidence now, that I am ready to go off and knit more garments.
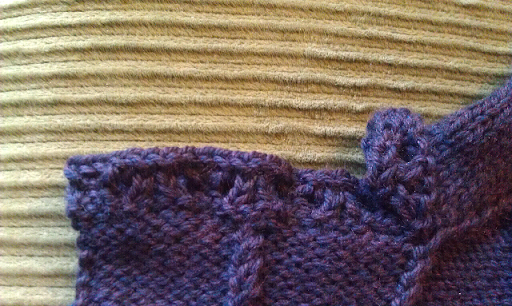

I could have made the sleeves longer, but I really love the cap sleeves of this sweater.


Today is the 3rd year anniversary of ChemKnits! Thanks for sticking with me for so long.

Sunday, December 25, 2011

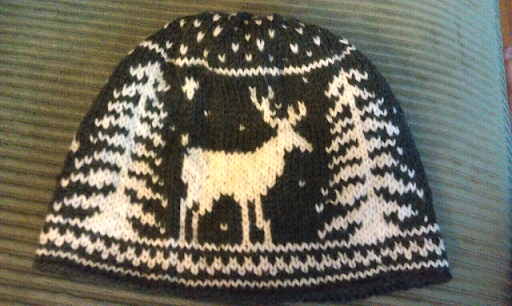
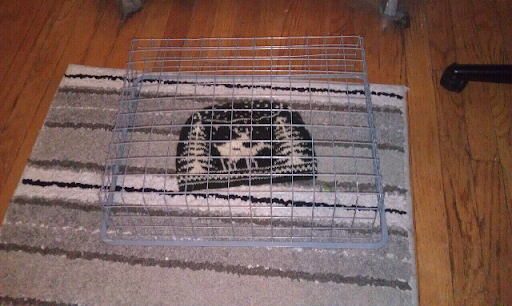
Frolicking Deer Hat


Merry Christmas, Everyone! The following is on of the silliest knitting projects I have every made, and I'm sure that Andy is going to love it.

The frolicking deer hat is designed as a double width hat, and is pretty huge, both in length and width. I only knit one layer, one “frolicking” deer and two normal deer (using only 3/4 of the total stitches - 108.) I also altered the bordering charts (removing over 10 rows) to make them shorter, and shorten the final decreases on top.


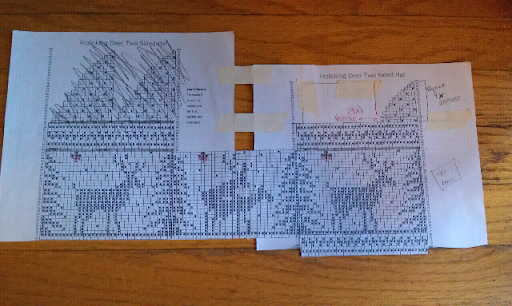
I cut and paste the charts together to help make what I needed to finish the hat. Since I had fewer stitches, I had to modify the decreases, too.


Even with the modifications I made to the chart, I still was very concerned that the hat was going to be too large. I kept comparing it to a hat I made for Keith's brother (will be published at the end of this month.)


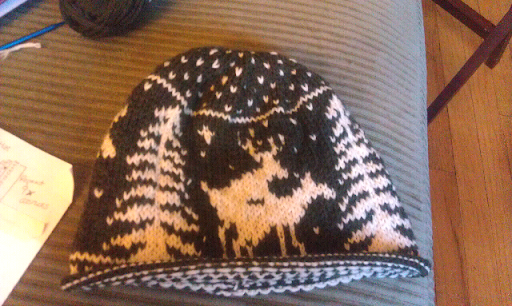
Since there was no ribbing in the brim, it curled a bit. I basted it closed with some yarn and then wet the hat to block it. Problem solved!


I had to cover the hat while it was blocking so Indy wouldn't think it was a toy for him!


I knit this Reindeer hat on size 7 knitting needles with KnitPicks Wool of the Andes yarn. I used 44g of Evergreen (MC) and 25 g of Cloud (CC).


Once again, I want to wish everyone Happy Holidays, Merry Christmas and a Happy New Year!

Saturday, December 24, 2011

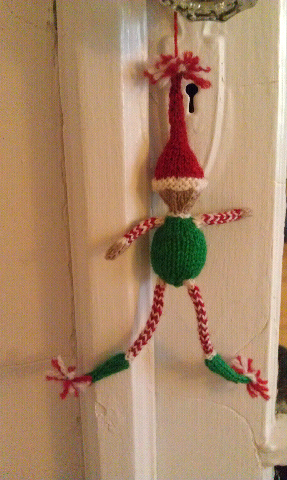
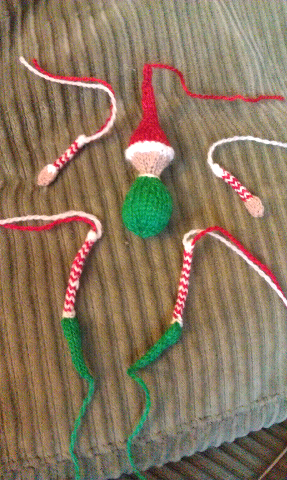
Silly Elf


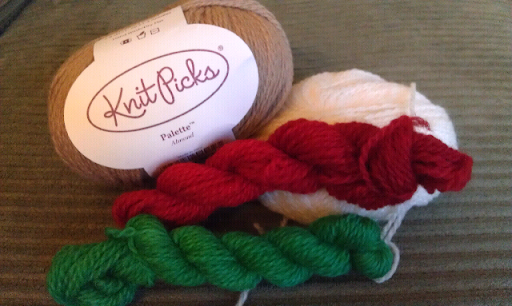
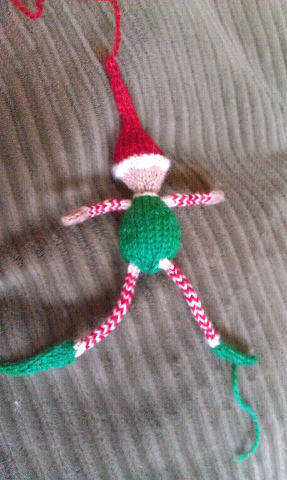
When I saw the pattern for this Holiday Elf, I knew that I needed to put all of my other knitting projects on hold to start this. Size 2 (2.75 mm) knitting needles, and KnitPicks Palette inHanddyed Red and Green, White and Almond (store dyed.)


This Elf knit up really quickly. I didn't even mind weaving in ends as much as I usually do!


Although I have been weighing most of my projects recently, this one seemed to be small enough that it isn't worth it.

I didn't have small enough beads for his eyes, but I think I love him just the way he is
Isn't he delightful?


Idea: make a little halloween elf? Black and orange..... Of course, I have no orange... oh wait I may still have orange!! I never did end up making a Halloween elf... maybe next year....

Friday, December 23, 2011

Creating Twisted Stitches: Knitting through the Back Loop

Twisted stitches are useful, and beautiful. Many stitch patterns take advantage of k-tbl (knitting through the back loop.) I created the following video to demonstrate this technique.

Knitting Through the Back Loop; Creating Twisted Stitches:

Monday, December 19, 2011

Dyeing Yarn with Food Coloring on the Stovetop


It almost feels silly to share this video tutorial with you now, as over the last few months I've shared many different yarn dyeing tutorials with you. Unlike some of the more advanced techniques, this video will show you how to dye yarn a single color on the stove top. Good luck!


Wednesday, December 14, 2011

VIP Fibers - Free Samples

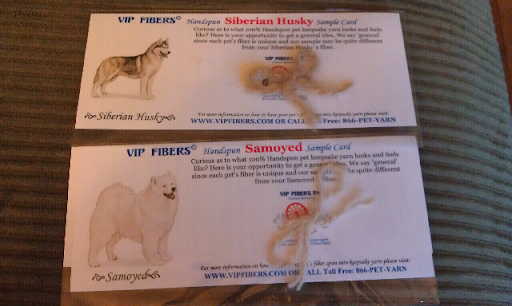
When I was researching services to spin pet fur, I came across an offer for free samples from VIP fibers! You can select up to four different species. The species change all the time, so you may need to check back for more options. (When I ordered the samples, there were 8 options, now there are over 71!)


Monday, December 12, 2011

Sticks, Hooks, and the Mobius: Knit and Crochet Goes Cerebral

What do you think of when you think about ChemKnits? The name of this blog was formed from the fusion of two of my biggest passions, chemistry and knitting. The name of this blog inspired me to design a series of molecule knitting charts and molecule based knitting patterns (including Caffeine Coffee Cozies, Resveratrol Wine Cozies and "Antibacterial" Cozies.)

I know other scientists who knit, but I never realized how many people would be interested in these molecule knitting charts. I am pleased to announce that 10 of my molecule knitting charts will be featured in the exhibit Sticks, Hooks, and the Mobius: Knit and Crochet Goes Cerebral opens at the Williams Center for the Arts Gallery at Lafayette College in Easton, Pennsylvania between Jan 8 - Feb 5, 2012. The curator of the exhibit contacted me last week to ask if she could use some of my charts to be the backdrop of a 3D knit molecule. I answered with a huge yes!

I do not live close enough to Easton, PA to go see the exhibit myself, so I would love to hear your impressions about this exhibit (and not just my tiny piece, there is going to be a lot of cool stuff going on there!)

Sunday, December 11, 2011

Pet Hair Yarn

Indy's fur is so soft, it would make a luxurious yarn. In the past when I researched custom spinning services, I came across some people who would spin pet fur into yarn.

I thought this was strange at first, and you might too. But considering that yarn is made form sheep, rabbit, goat and alpaca hair, why would dog hair be any stranger?

Today I am going to focus on services that will spin your pet hair into yarn for you (note that they may have to make it a wool blend to complete your pet yarn. )
Now you need to make sure to keep your pet's fur clean and free of moths/other fiber eating insects. Many of the services will clean the fibers for you, but this may involve additional cost.

Thursday, December 8, 2011

Scarf - Three Years in the Making

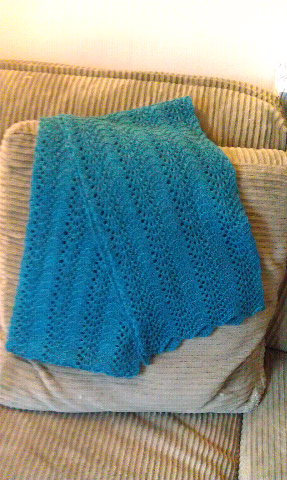
I am so excited! After three years I finally finished my lace weight Feather and Fan scarf (the pattern used to be free, but now you need to purchase it from a KnitPicks Ebook.)


Why did it take me so long to finish this scarf? Projects go faster when I know that I am making progress. With this scarf's simple 4 row pattern repeat, it grew at such a slow rate I had no measure of how close I was getting. (Yes, I can measure length... but the difference between 2 and 3 feet doesn't appear to be very different.) I ended this epic project with YO Row, K row, bind off K wise.


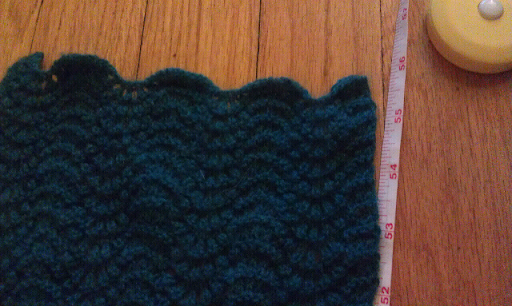
The scarf before blocking


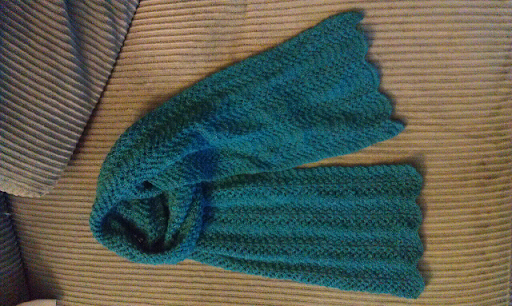
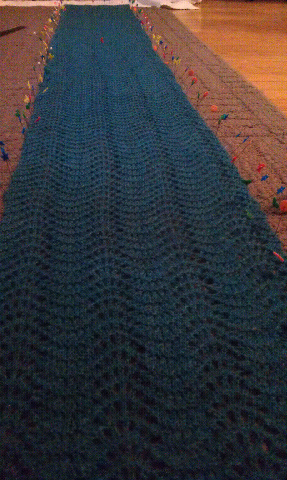
The length of the scarf before I blocked it.


I blocked the scarf to 9" wide, and ~ 6 feet long. The pattern held its shape fairly well without blocking, but it looks so much more polished once I took the time to complete the finishing.


I knit the scarf on size 3 knitting needles with KnitPicks Shadow Lace yarn, color Snorkel. The scarf required 1.4 skeins (70 g).


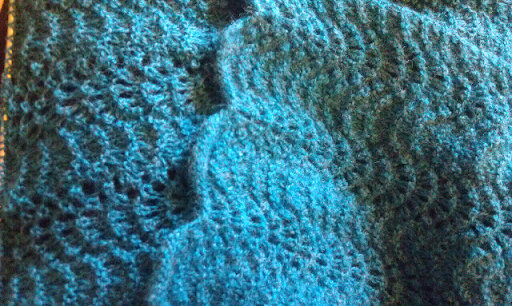
The oldest edge of the scarf has bloomed a bit, but I know that with some wear the entire scarf will age more consistently.


Journey of My First Lace Project (at least the first one that I started):

Call me crazy, but I already have multiple lace projects in my queue. Hopefully these will go by faster than 3 years!

Monday, December 5, 2011

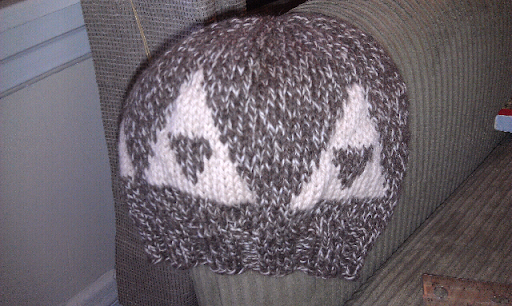
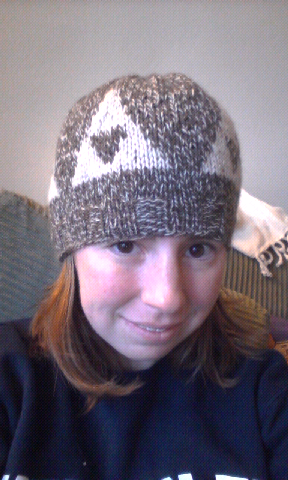
Zelda Triforce

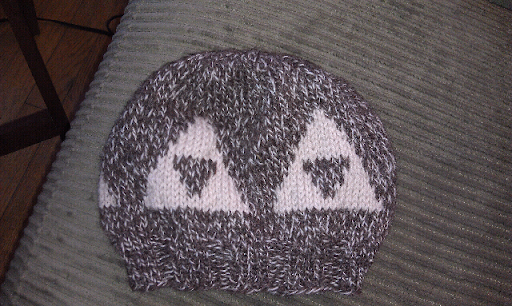
My brother goes to college in Wisconsin, but for whatever reason doesn't like to wear hats and scarves. He loved the dark mark scarf I made him a couple of years ago, so I wanted to find something equally as silly that he would love a hat... the Zelda Beanie.


I cast on 100 stitches, not 99 like in the pattern. I was therefore able to keep equal distance between each of the squares in the chart. The hat measured 5.5 inches long after finishing row 34 in the pattern instructions. I decided to try to make it to 6" (3 extra rows) before starting the decreases (at row 35 in the instructions). Because I was knitting the pattern with 100 sts (not 99), I ended up with a K3tog at the end of the first decrease row.


The hat required 40 g of the MC (Lion Brand Fishermen's Wool Yarn (201) Maple Tweed) and 10 g of the CC (KnitPicks Wool of the Andes Worsted, Oyster Heather). I knit the hat on size 6 needles.


I had a wonderful surprise when I gave my brother his hat over Thanksgiving. Turns out that the new Zelda game became available that week! He was all excited to go and get the game, and therefore loved the hat even more. (He was also glad that I chose subtle colors for his hat.) Happy Chanukkah, Jacob!

Friday, December 2, 2011

Celtics Logo Knitting Chart

The next step on my run of Boston sports teams... Boston Celtics Knitting Charts. Go Boston!


Boston Celtics Logo Knitting Chart V. 1 - 35 x 27 sts


Boston Celitcs Logo Knitting Chart V.2 - 35 x 27 sts


Boston Celtics Clover Logo Knitting Chart V.1 - 17 x 18 sts


Boston Celtics Clover Logo Knitting Chart V.2 - 22 x 23 sts


---------------------------------------
These knitting charts were created by ChemKnits for your personal or charity use. You are not to distribute or reprint this pattern without the permission of ChemKnits. © 2011 ChemKnits

Wednesday, November 30, 2011

Lovely yarn

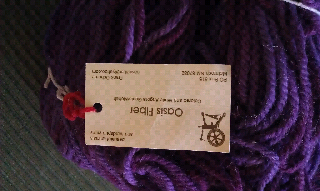
I love hand dyed yarn, whether it comes from dyeing yarn in my own kitchen or yarn dyed by someone else. Purple is one of my favorite colors, and was the dominant color of my wedding. One of my bridesmaids, Jamie, gave me this stunning handdyed (and handspun!) purple colorway for my bachelorette party.


Beautiful shades of purple. And 18 oz!!

The yarn was spun by Frank Osborne of Oasis Fiber. (Contact at: 505-384-4277 or email oasisfiber@yahoo.com) The fiber looks heavy worsted, and there are 18 oz (510 g) of this yarn. What should I make out of it?


I'm still learning how to use my phone to create blog posts. Even though I have rotated this photo on my phone, whenever I try to re-import it into blogger it still shows upside down! Hopefully I'll learn a way to fix this up sometime soon...

Sunday, November 27, 2011

More Pictures of the Anemone Coat Check Scarf


I designed the Anemone Coat Check Scarf because I wanted to solve a problem. When going to restaurants and parties in the winter, I would often brave the winter cold because I was afraid of losing my gloves and hats while hanging my coat. This coat check scarf is a big pocket, so you can store your mittens inside the scarf and securely hang all of your knit accessories on a hanger.

This pattern is available to purchase ($2.50) through Ravelry.


This was my first time using KnitPicks Capra yarn, and I have to say that I loved the way it felt on my hands. This project took just over 2 skeins of yarn, leaving enough of one skein for another small project.


The buttons I used in this scarf I also purchased through KnitPicks, but unfortunately they have been discontinued. I still have 3 of these buttons left, but I really wish that I could get a couple more this size for another knitting design I have in mind.


The hardest part of this scarf was aligning the snaps to sew them onto the scarf correctly. It was easy to sew one side of the snaps to the same position of the buttons, and for the other side I started at the corner and worked my way up the side. I would quickly fix each snap into place while I had some of the other ones snapped to make sure I had things aligned correctly.


The Anemone Coat Check Scarf is a fairly quick knit, and although there is a lot of repetition, I didn't find myself getting bored.


I am now waiting for cold weather so I can have the chance to wear this scarf out!