Wednesday, August 31, 2016

My First Quilt - Part 1 Planning and Cutting

I knew that as soon as I purchased a sewing machine that it was only a matter of time before I started my first quilt.  My Aunt is a fantastic quilter and has made a number of amazing projects for me over the years.  Lucky has two handmade quilts, one from my Aunt and another from my mother.  I thought it would be wonderful if the first quilt I ever sewed would be for Rowdy.  (I did hand sew and tie a simple patchwork quilt as teen but that came as a kit so I'm not counting it.)  

My first quilt!
I always take notes while working on a craft project, but I kept a lot of journal style notes for this quilt.  Since there are SO MANY pictures I will divide this project up into 3 different posts:  Planning and Cutting, Piecing the Top, and finally Quilting and Finishing.


The inspiration

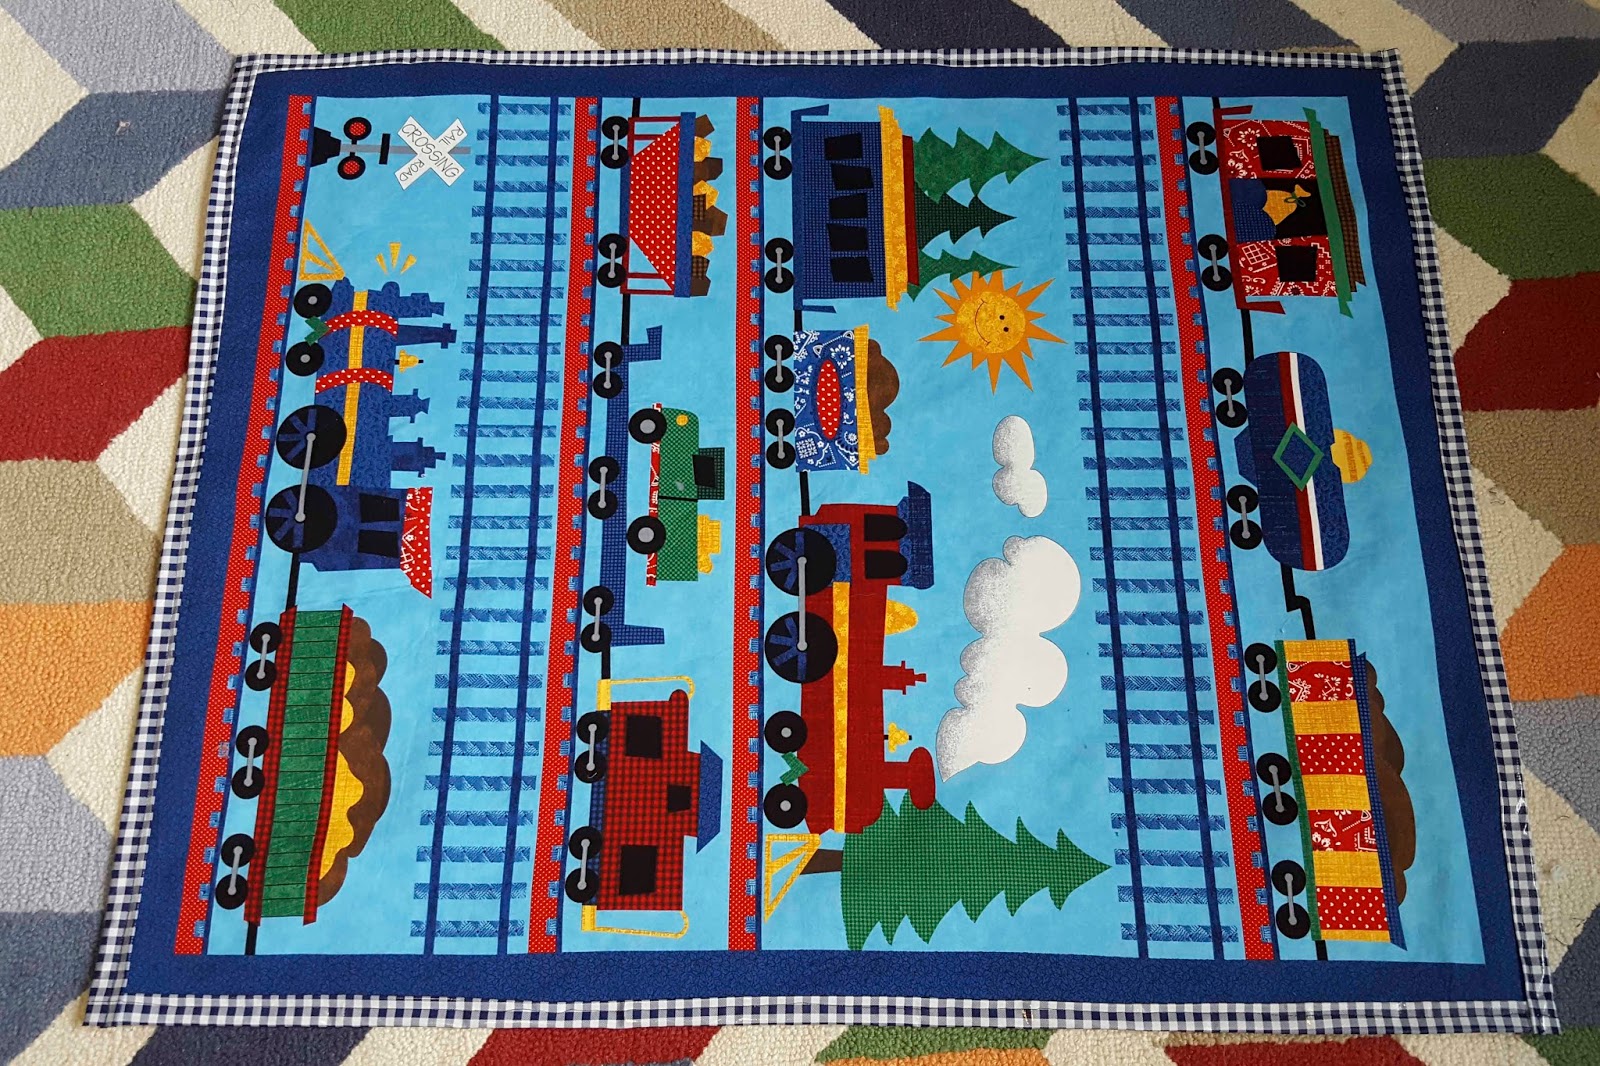
I found a dinosaur print that I loved but wasn't sure of how to pattern it.  While exploring a near by quilt shop (that has since closed due to retiring owners and the lease not being renewed) I saw the above quilt hanging on the wall.  I loved the way the pieces were spread out and that there was a big center panel.  The owner told me that they used 5" squares to make this.  Based on this picture and knowing that the 5" squares were precut I reversed engineered the quilt in PowerPoint.


I had a lot of nerves while picking out the fabric.  Five of the patterns were easy to put together, I found them over time and they are part of a coordinating set (Nursery "Dino Dots" from JoAnn's Fabrics - I used some of these in my home sewn crib sheets.)  However with the design I was working towards I knew that I wanted to add some more patterns of different scales to the other squares and triangles.  First I got to 8 fabrics, but realized that I don't want the layout to seem "even" with 4 of each square, so I hoped to find a couple more fabrics I loved at the local fabric shop.


My fellow Wellesley crafters helped me with my dilemma for the back of the quilt.  With a planned ~53" square a normal piece of quilting fabric would not fit across the back of the quilt.  However, if I add a horizontal piece of quilting down a "seam" I can create an intentional break in the fabric.  This should allow me to use up some of the extra fabric I already have, plus give me a nice spot to potentially applique on the baby's name.  I don't want to get too ambitious though, and first I'll try to work through the quilt top.

Diary of the Quilt Construction - Since I expect to spend more than just a few days working on this project, I want to go through my thought process for the whole project.  These notes will help me keep track of where I am and what I need to do.  This way if I'm interrupted by the baby being born, I should be able to pick the project back up.  

12/13/2015 
Today is my birthday and I'm ready to officially start cutting pieces. Of the fabric I have for the center square and the outside edges, I bought 1.5 yards.  There are just over 52" of length post washing.  If I have the strips cut as shown, then I only will need 48" of length.  Worst case scenario I have to extend them with a piece of something in the corners, but I'd prefer to not have to do that.  Or I suppose I could buy new fabric with 2 yard length.

Anyway, I wanted to start cutting with this fabric.  I know I am going to need more fabrics for the binding and if I have to order more of this, too, then I want to know.


After cutting the 16x16 inch square, I still have over 24 inches of the entire 52" length of fabric.  This doesn't give me a ton of wiggle room, but I have enough for 4 5" strips easily.  I will not order more of this fabric at this time.


The backing fabric is a fun patterned navy.  I learned that using subtle patterns can give a quilt more depth when I walked through a local quilting shop, so I looked hard to find a navy on navy print.


In my binding calculations, I was conservative and estimated that I'd want 3" binding strips, I'd use 40" wide fabric to make the strips and be finishing a 60x60 quilt.  According to the quilt binding calculator, I'll need 230" total binding length which will require 7 strips and a total of 5/8 of a yard of fabric.  This is more than I have of any single pattern currently in my stash.  I could make the binding out of multiple fabrics that I use in the quilt, but I'd like the option to do it out of a single fabric.

What else do I need for this project? I need cotton batting and thread.  From my online research it looks like I can purchase a thrown sized batting that would be 60"x60".


Between the small squares, and large and small triangles there are 52 pieces to surround the quilt.  I have 14 different potential fabrics to use for this section.  I'm not going to use all of the ones pictured above.  I have the same pattern in both yellow and blue and I will only select one in the end.  I also think I will only pick one graphic yellow or one graphic light blue, not both.  If I use 12 fabrics then I'll have between 4-5 pieces of each color, should I try to distribute things relatively evenly.

4/28/16
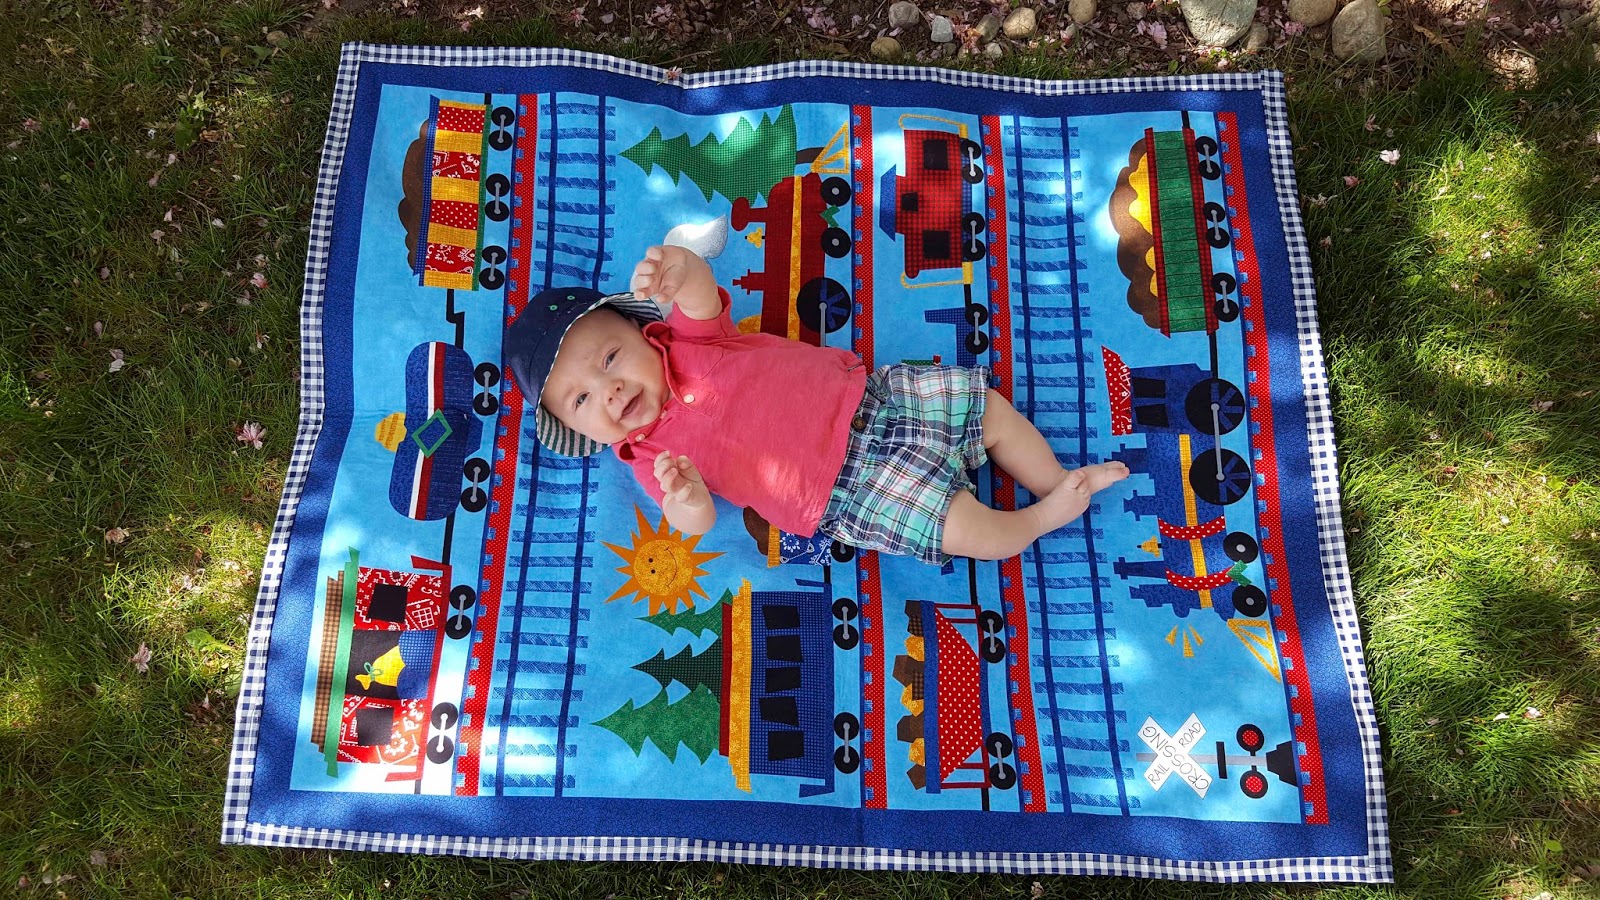
Baby "Rowdy" came early (mid January) so the quilt project got put on hold for a while.  Now that he is 3.5 months old I have a day alone with Rowdy so I can do some cutting while he coos next to me.  (Thank you Keith and Grandmama!)


I'm bummed that the store where I purchased the navy fabrics and got some of my fat quarters is going out of business.  I'll miss you Button Box!  Thank you for giving me inspiration for this project and helping me figure out what I needed to get started.

I need 32 - 5" squares and 20 - 5" right triangles (4 of these triangles are smaller but I'm going to go ahead and cut 5" triangles to give me the most flexibility with placement.)  I'm going to wait to cut the larger border sections until I have the rest of the top pieced.  With a plan to use up to 12 different fabrics, I'm going to start by cutting 4 - 5" squares of each fabric.  I did end up cutting some extras so I would have an easier time to play as I was laying out the fabrics.

  
Can we take a moment to talk about patterns not being printed on grain?  Many of these were slightly of of the grain but I cut the fabrics on grain.  With the alphabet squares, however, I just couldn't deal with how askew it was!


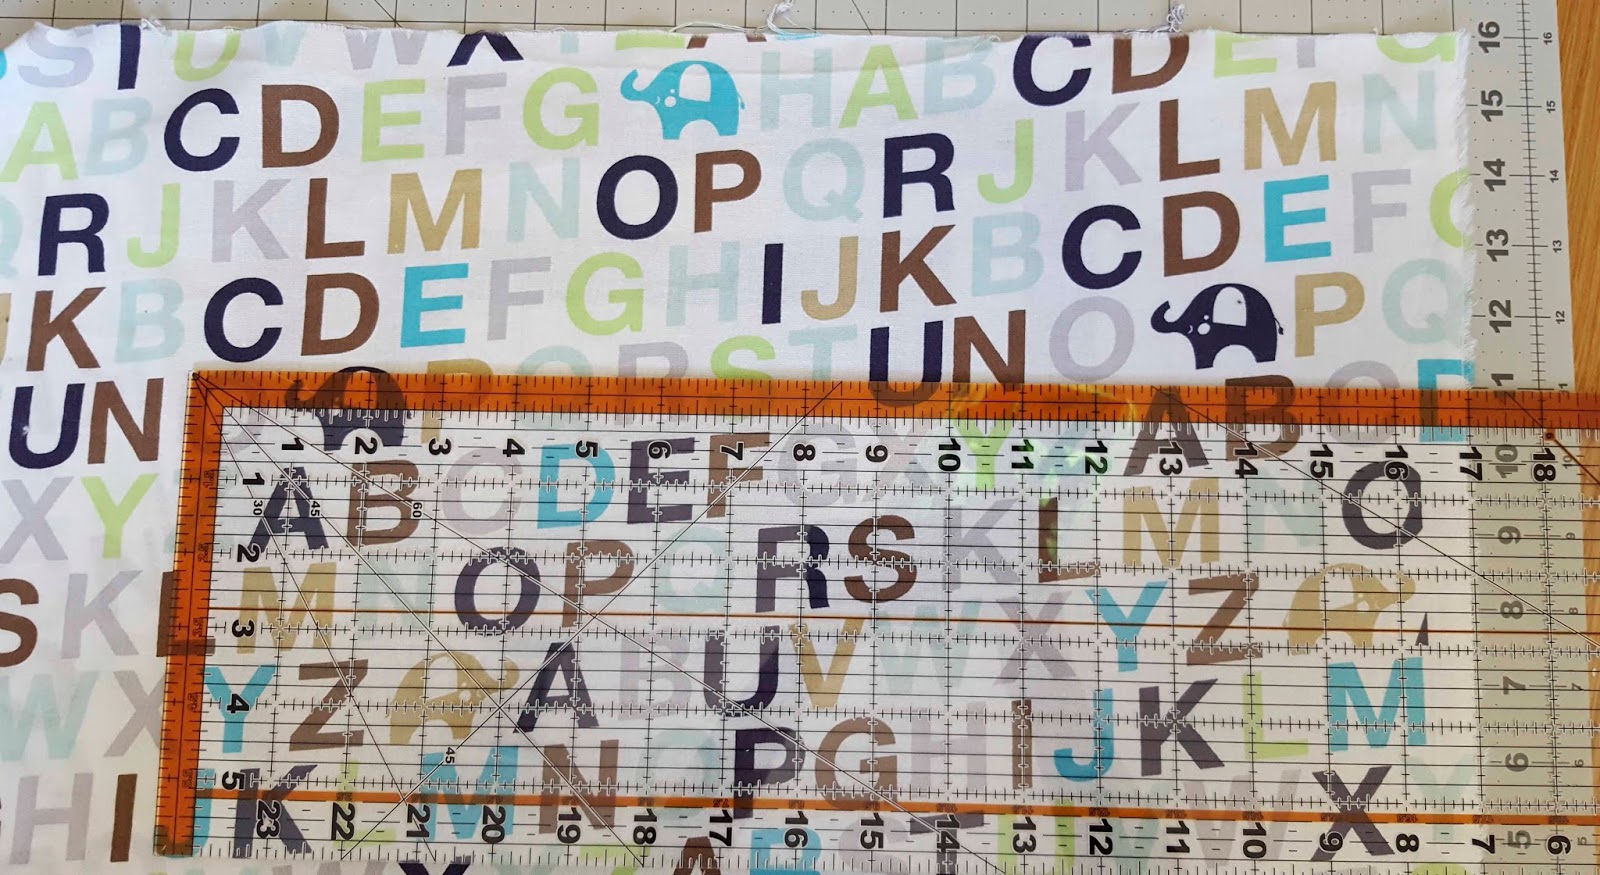
On the advice of a quilting friend, I cut these according to the pattern not the grain.  This was frustrating because the alphabet isn't even square with itself!  My friends (yay Wellesley Quilters!) recommended using a starch spray or something to help stiffen the fabric so it doesn't stretch strangely as I'm sewing.  In the end I was able to include Rowdy's initials (RB) in 3 of the squares so I'm happy!  (The elephant was cute but it didn't go with the dinosaur theme so I cut around it.  Sorry elephant!  I'll use you next time... or maybe I'll never use this fabric again because it bugged me so much.)  


I started arranging the squares at random around the center panel.  I really like where I got on the first attempt with only a few tweaks.  Now I just have to decide on the direction the patterns should face.  The center panel will be on the bias so the "up" direction will be pointing northwest.  I have a lot of prints that have some kind of orientation to them.  If each print would be on a square more than 2-3 times I might "randomize" what direction they were facing but it looks strange and somewhat off as I have it in the below picture. 

Rough Layout Attempt

It is important to consider the orientations before I cut the triangles because it will matter how I cut them in some cases.   I think that the cutting went really well and I'm thrilled with my first draft of this layout.  

The first draft of the layout.  Notice any glaring orientation errors?
I'll take a closer look at the layout before I start sewing, but it isn't bad for the first pass.  

For the borders, I purchased 2 yards of this semisolid navy fabric.  The pattern is subtle and hopefully it will make the quilt feel rich.  I need to cut a lot of long 1.5" strips, so I pressed the fabric in half length wise so I can get close to 2 yard strips.  I'm making the long strips EXTRA long so I can have plenty of extra if I need it.  I plan to cut all strips in the same direction so it won't look strange if I need to cut out a few extra from the long pieces as I near the end.  (72" should be way too long since I am aiming for a 53" square quilt but I'd rather over cut than undercut!)  My calculations say I will need 43" for the inner border but some of the diagonals might be longer.  


Seven extra long strips should be plenty to cover the inner border and long diagonals... but I cut 8 sort of by accident.  If this isn't enough then I can always join two strips together to help make a longer one.  Even though I only pressed the fabric in half once I folded it in half a second time and cut through 4 layers at once.  Pressing down the clear ruler with my knees helped me cut through in one cut.  It looks pretty straight to me when I open it up.  Yay!  


To cut the smaller strips I cut some more longer strips and then split these into smaller pieces.  I should need about 38 - 5" x 1.5" strips.  Cutting them went much faster than I expected.  Wahoo!


At the end of my day alone with Rowdy I had cut all of the pieces I need for this quilt. Now I just have to start sewing it together, but I'll wait until I have another Lucky free block of time.  


I'm so glad that Rowdy is a trooper for me to work on this project.  Stay tuned to the next diary of my first quilt where I'll talk about my journey of piecing together the top!

Friday, August 26, 2016

A Train Tummy Time Outside Blanket


Fiber crafters are truly marvelous people.  I've received many gifts from fellow knitters, spinners and now sewers.  When I was learning to spin, a local spinner gave me a trash bag full of different types of fiber so I could experiment (including dog, wool, alpaca, cotton and more!)  Now that I'm learning to sew, someone on Ravelry sent me a bag of remnant cotton fabrics to help me have some scraps to play with.

Train Panel.  ~35" x 44"
I say scraps, but most of the pieces in the pouch from Canada are larger than a fat quarter!  Included in the bag was this wonderful train panel.  I would never be able to cut it up and so I spent some time considering what I should do with it.  I wouldn't want to make a quilt around it since the scale of the print is so big... what could I possibly do?

Rowdy will be 4 months old tomorrow and I currently struggle when we go outside to play with Lucky.  At the playground, I wear Rowdy in the ergo and that works great, but at home I want to be able to put him on the ground.  The small flannel blankets we have blow over and get scrunched up, which doesn't make for cute photos.  Plus if the ground is at all wet then I worry about my littlest getting soaked during tummy time.  Aha!  I can use this train panel to make a water resistant picnic blanket!  There are many awesome tutorials out there but I really liked the Picnic Blanket Tutorial by Design Sponge.


I considered quilting the trains (lightly quilting) to some batting but this project really doesn't need that amount of effort.  I got some fusible fleece (Pellon TP971F - Fusible Thermolam Plus) that I can iron directly to the train fabric to give it some more weight.  Then it will hold its own better once sewn to the oilcloth PLUS it will be extra comfy.  One yard of the oilcloth is a perfect fit for the blanket.


The back side of the fusible fleece grips onto the cotton fabric really really well.  It took a few times to align the panel and smooth it out but once that was done I was ready to cut.


I started in the middle with no press cloth on the wool/steam setting of my iron.  When I got to the edges I used a yellow cotton scrap of fabric as a press cloth.  I had to take a break from the ironing because Rowdy woke up.  I wanted to make sure I paid special attention to the edges and really fused the fleece to the fabric so I went over it a number of times.


The back of the vinyl is a little sticky, too so the fusible fleece actually stays on it really nicely.  I am only going to trim the vinyl a little bit but then do a double folded hem around the sides.  I started with one of the long sides and finger pressed the vinyl down once and then a second time for it to overlap the blue border.  I hated to put pins in the vinyl but I did it to hold the edges secure and then used navy thread to stitch down the borders.  After both long sides were done I did the short sides.


Woah, this is hard to sew.  i set my straight stitch length to 4.0 (tension 3) and had to pull it through the machine, the vinyl wouldn't slip through with the feed dogs on its own.


Once I got the hang of it I just made sure to let up off the pedal before I stopped pulling.  The second seam was MUCH better and straighter than the first.


I didn't change my needle... mainly because I don't know HOW to change my needle.  Thankfully the fabric didn't tear or anything like that.


I LOVE LOVE LOVE it!  This train fabric is so joyful and I'm so glad that I found a fun way to use it that didn't involve cutting it up.  Rowdy is currently sleeping so I have to wait for him to wake up to play with it outside.  I'd say I can't wait but please, baby, take a long nap!  (Of course Rowdy spit up on the blanket during his first tummy time!)


The train panel is just so pretty.  I'm not sure if you can tell from these pictures, but each section of the train has a different pattern it it so it look like it is made out of a bunch of appliqued pieces.  It make a beautiful blanket.


I really like sitting on this myself.  It is a great size for one adult, and I could see myself using it for soccer games or other times I have to sit somewhere while my boys are playing.  I think that I will make a larger one for the family to use in the future, although I shudder a bit at stitching two pieces of vinyl together and getting those through my machine. I wonder what else I can make out of oilcoth!


started and finished 5/13/2016

Monday, August 22, 2016

A Frog Hat


Lucky LOVES his preschool.  I knew that one of his main classroom teachers was pregnant and I wanted to make her a little crochet Wolf Hat for the little girl.  I found out later that Lucky's Hebrew teacher is due at the same time so I needed to make a hat for this little one as well.

I didn't know the sex of the second baby so I wanted to pick out something gender neutral, fun, and would work with colors I had in my stash.  The Crochet Frog Hat from Repeat Crafter Me fit the ticket and Would use up some of the green yarn that I've had in my stash FOREVER.

I used KnitPicks Wool of the Andes Worsted weight yarn in Avocado (26 g, 57 yards), White (not measured), Black (coal, ~1 yard) and a maroon color I had in my stash without a label.  Like the wolf hat I crocheted this on a size H hook and made a 6-9 month sized hat.


Since with the Foxy Wolf Hat I waited to do the embellishments until the end and couldn't see well enough to crochet with dark stitches in the near dark, I decided to start out with the embellishments this time. Of course, the embellishments for the frog are all circles so that is pretty easy to do and if I can't do this in the dark then I can't do the hat itself... but hey, I'm done with the fiddly bits!


I decided to modify the hat to be a skull cap, versus an earflap hat.  I did this based on the fit and size of the wolf hat and how it fit on Rowdy.  I followed the instructions for the fox hat size 6-9 months without any color changes.


I was worried that the eyes would not stand up because they'd be so heavy. I made sure to secure them to the hat in a few places and they did stand up!  Crochet is so sturdy compare to knits.  No blocking was required at all.


You guys, I've made two hats in two days and used up some yarns from my stash.  I've used up yarns that aren't the staple colors, such as black and white!  Wahoo!


Now I just need to convince myself that I don't need to replenish my stash...  Wool of the Andes is such staple in my collection that I love to have some on hand to make last minute baby gifts.  I wish that I had machine washable wool in my stash but I rarely had to wash my babies' winter hats so I did not personally find the car difficult.  


Ribbit, ribbit!  It is fun to say this around a fiber project when I'm not frogging (rip-it, rip-it!)  

Wednesday, August 17, 2016

Wellesley Reunion Tie Dyed T-shirts


This summer I celebrated my 10 year reunion at Wellesley College.  The class of 2006 is the purple class so I wanted to find some purple shirts for my favorite accessories... my boys!  I thought it would be fun to dress up Keith (who is always such a good sport), Lucky and Rowdy in matching purple tie dye T-shirts to help me celebrate this milestone.


I purchased two different purple fat quarter options for the applique. I'm not quite sure how the color of the shirt itself will turn out so I want to have the choice between a patterned and a solid to make the Wellesley W on the shirt.


My plan is to applique a Wellesley W on the front of each shirt.  Maybe the sizes will vary based on the age of the wearer.  I'd also love to add "06" to the shirt somehow but I don't want to get ahead of myself.  Let's see how hard the first "W" is.


Normally I do a starburst pattern when I tie dye, but I wanted to do something a little more subtle for reunion.  I accordion folded the shirts starting at the top right shoulder (from when I'm looking at it, left shoulder for the wearer) and folded the shirt along a diagonal.  I placed the rubber bands at intervals along this length to hold the folds together.


The Tulip Tie Dye Kit instructions say to either dye the shirts dry or dry them wet straight out of the washing machine.  I did prewash the shirts but I also predried them.  I thought it would be easier to fold them up when dry so I folded them first and then soaked them in some water for 30+ minutes.

Part way though the dyeing process

Guess what, friends!  I filmed the dyeing process so if you want to try to recreate this pattern for yourself you can watch what I did, not just read about it.  


I waited for almost 36 hours before unwrapping the shirts.  I timed this around naptimes and wanted to make sure I got a nice deep color. 


I am a huge fan of how the shirts came out!  I especially like how the red shirt came out, it exceeded my expectations for a single color tie dyed garment!  (I have a friend in the red class who has been going though some struggles and her baby is the same age as Rowdy.  Even though this isn't her reunion cycle, I decided to make her little boy a red Wellesley onesie to send some love.  The W is purple because he is part of the purple class in spirit.)  


The first two times I washed the shirts I included some Shout stain catchers in the wash.  A lot of color came out, even on the second wash.  I will continue to wash these on their own for a while so I don't turn anything else purple.


Now it is time for me to cut and applique on the Wellesley "W".  I know that the W's will each be a different size because the shirts are different sizes.  I looked at the two purple swatches against the shirts and the solid purple is a MUCH better fit against the busy purple background


For the first part of the appliques, I am going to use Pellon # EZ2L (Lite EZ-Steam II Fusible webs and adhesives with backing.)  I cut the adhesive to be the approximate size I wanted for each of the shirts.


Drawing the Wellesley W is MUCH harder than I thought!  It took me a few times to get the shapes the way I wanted.


Thank goodness the W is symmetrical so I didn't have to worry about drawing the reverse.  Next time I do something like complicated I want to print it out and trace it versus trying to do it free hand.  


When I finally finished cutting out the W's I was super happy with the way they looked.  Phew!  It was worth the effort to draw them nicely.  


I love the way the ironed on appliques look.  Reunion is just over a week away, and I decided to skip sewing down the appliques for now.  I don't want to risk ruining the shirts when they look so crisp right now.  I will play around with sewing on appliques in the future.

When I washed the shirts (AFTER the first day of reunion) it turns out that I should have sewn the appliques on.  They pealed off of Lucky's and Keith's shirts!  At least I got some cute pictures of the boys on campus.  Rowdy's survived and I might be able to salvage the other ones at a later date.  Next time I'll make sure to sew them down before sharing them.


After washing
On the day of reunion, I made sure to take some pictures of the boys dressed up before we headed to campus.  The shirts looked perfect!  I wanted to make sure that I had some pictures that showed the W before we got there.  


Lucky was SO EXCITED to visit Mommy's school.  He'd been to campus at least twice before but this is the first time that he understood that it was a special place for Mommy.


We didn't stay on campus since we leave nearby.  Maybe when the boys are over they can have a sleepover on campus during reunion.  I imagine that there will be a lot more kids there for our 15th reunion!


One of the highlights of reunion is the alumnae parade.  It was wonderful to see alumnae for the 75th+ reunions!  It is like a glimpse into the future as we see alumnae walk and fall in behind them in order of class year.  Too bad it rained this year, but I think that 5 years from now the boys will walk with me.  I will have to make them new tie dyed shirts, but hopefully they'll be willing to wear them with me!


We went back to Wellesley later in the summer for official family pictures, but I really enjoy this one of us from reunion next to the science center.